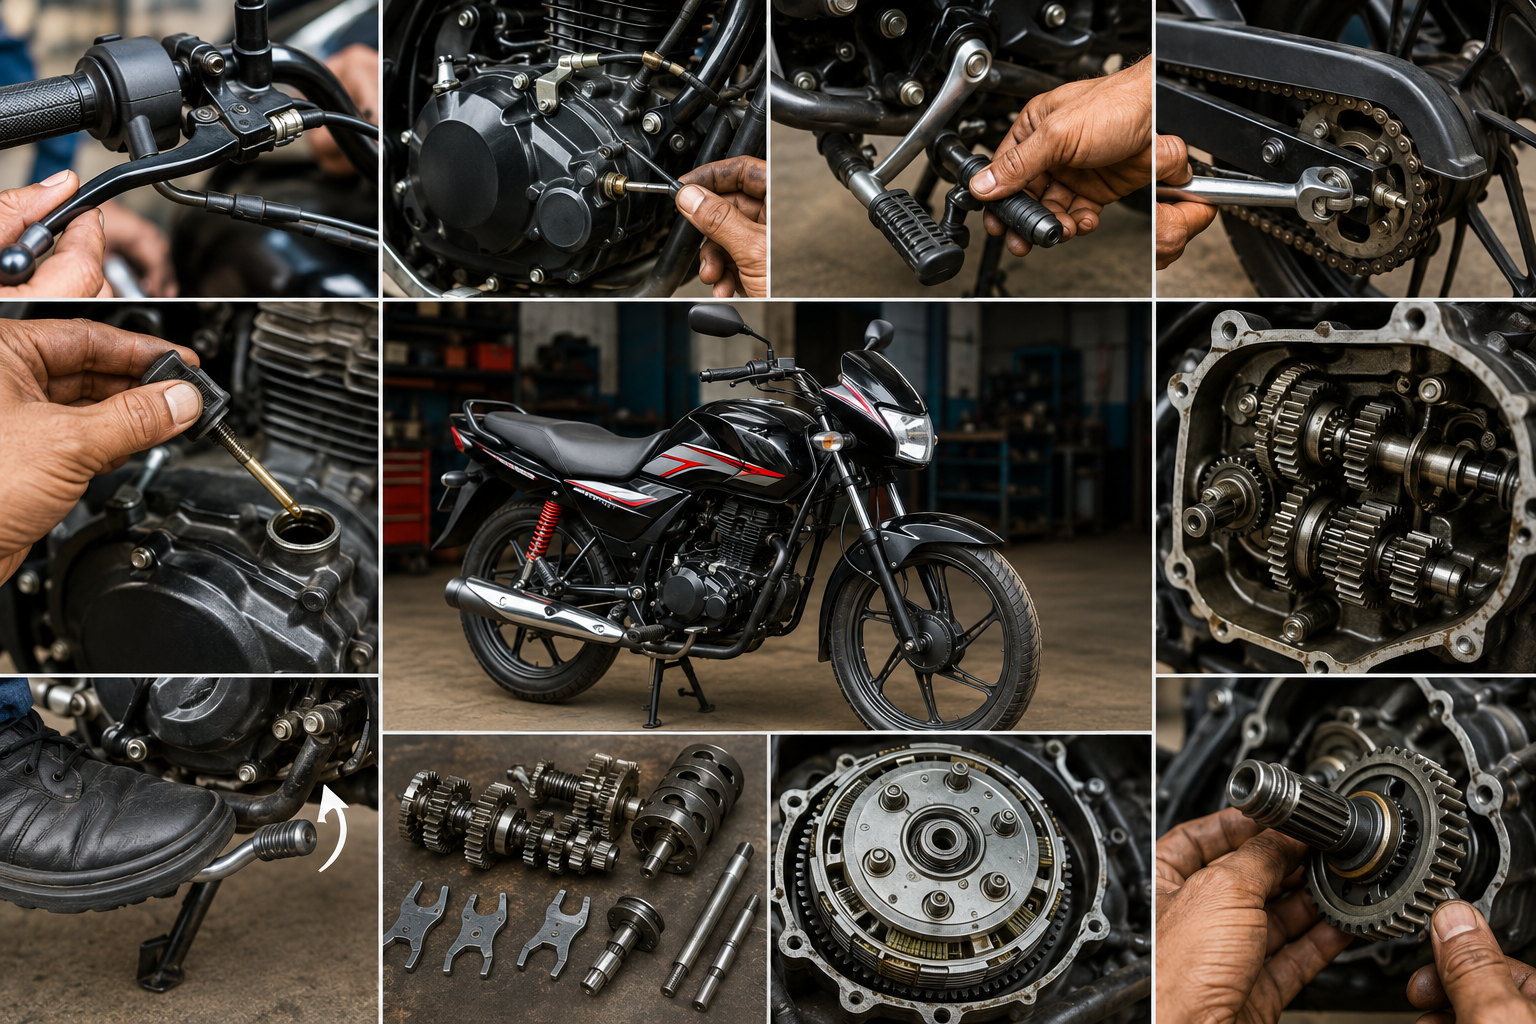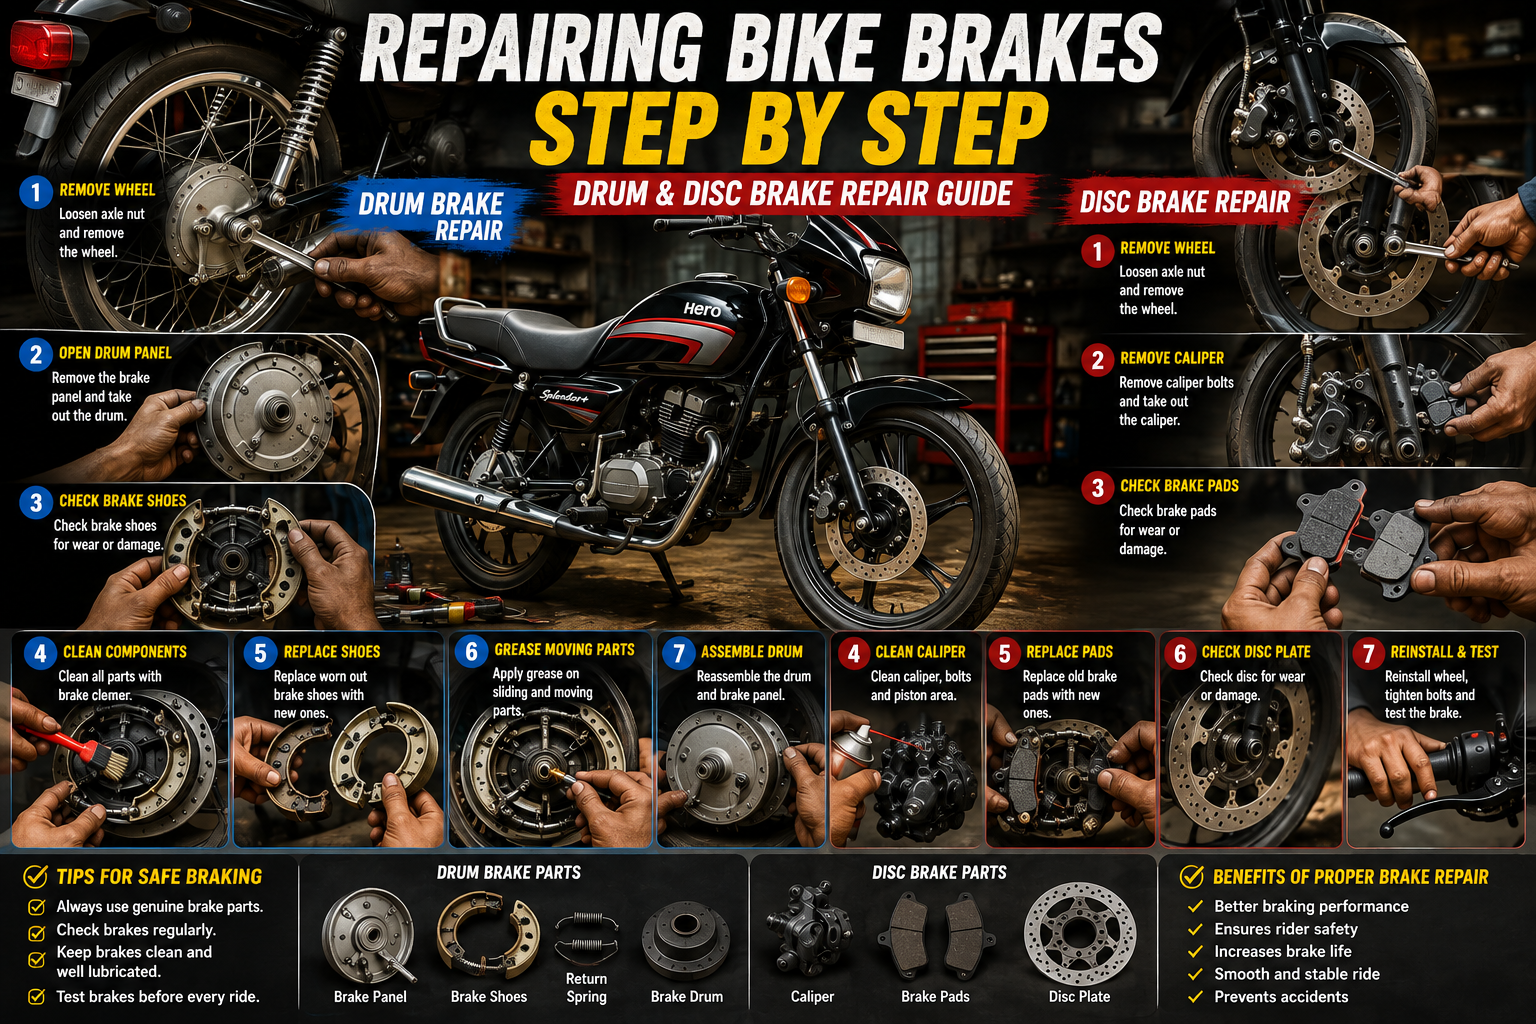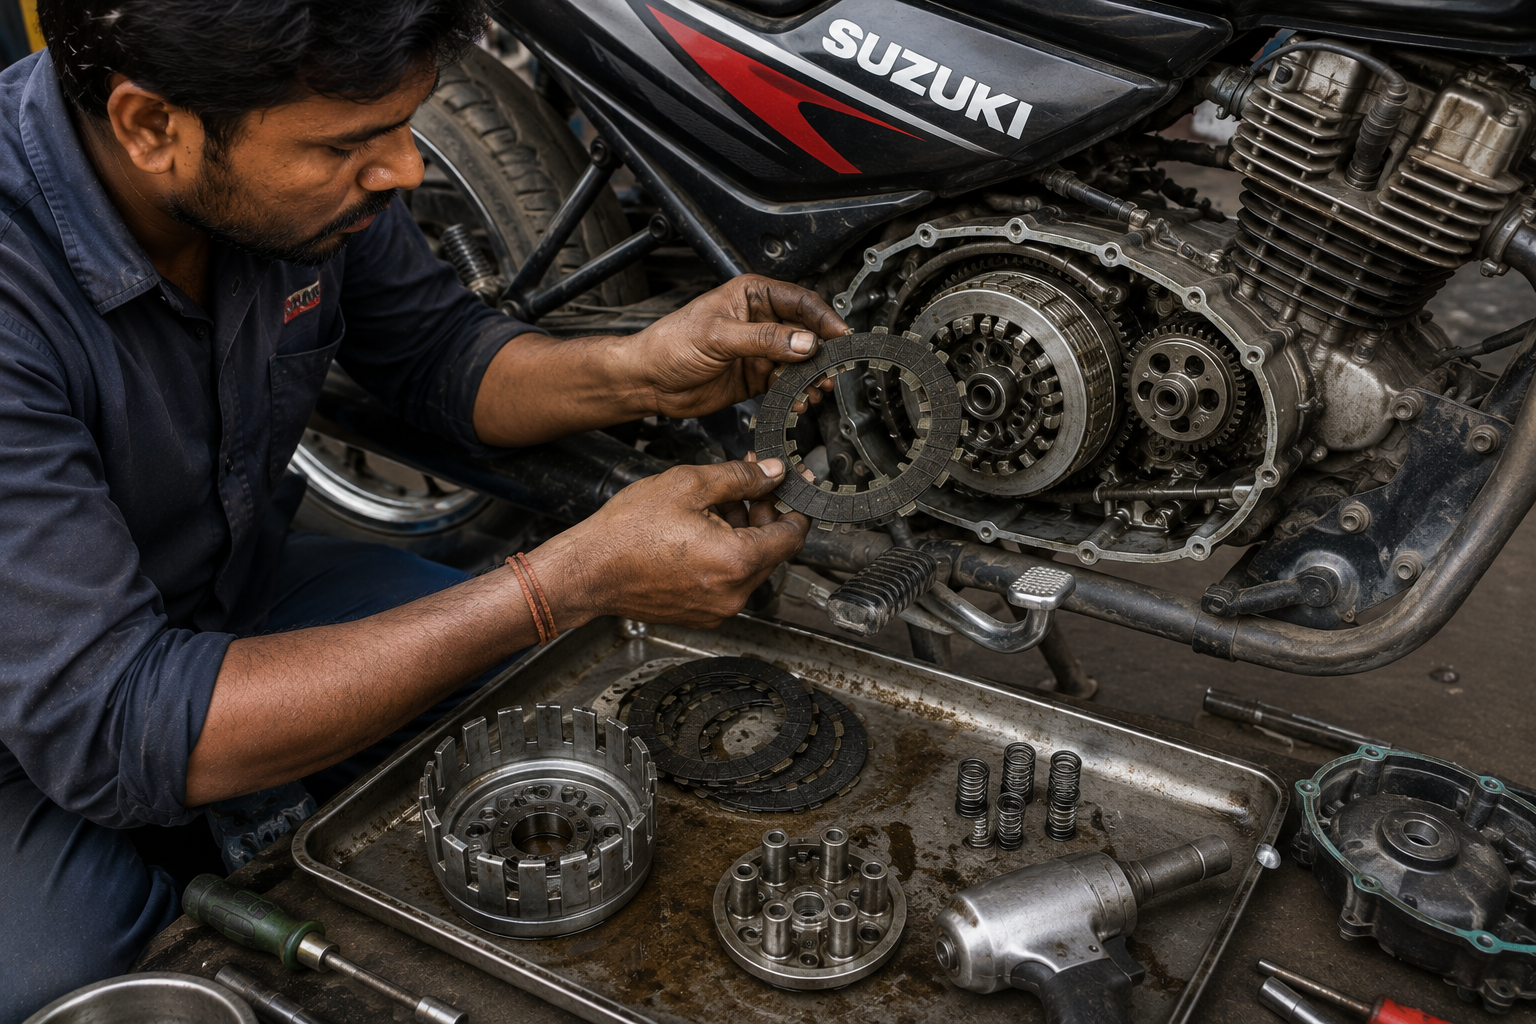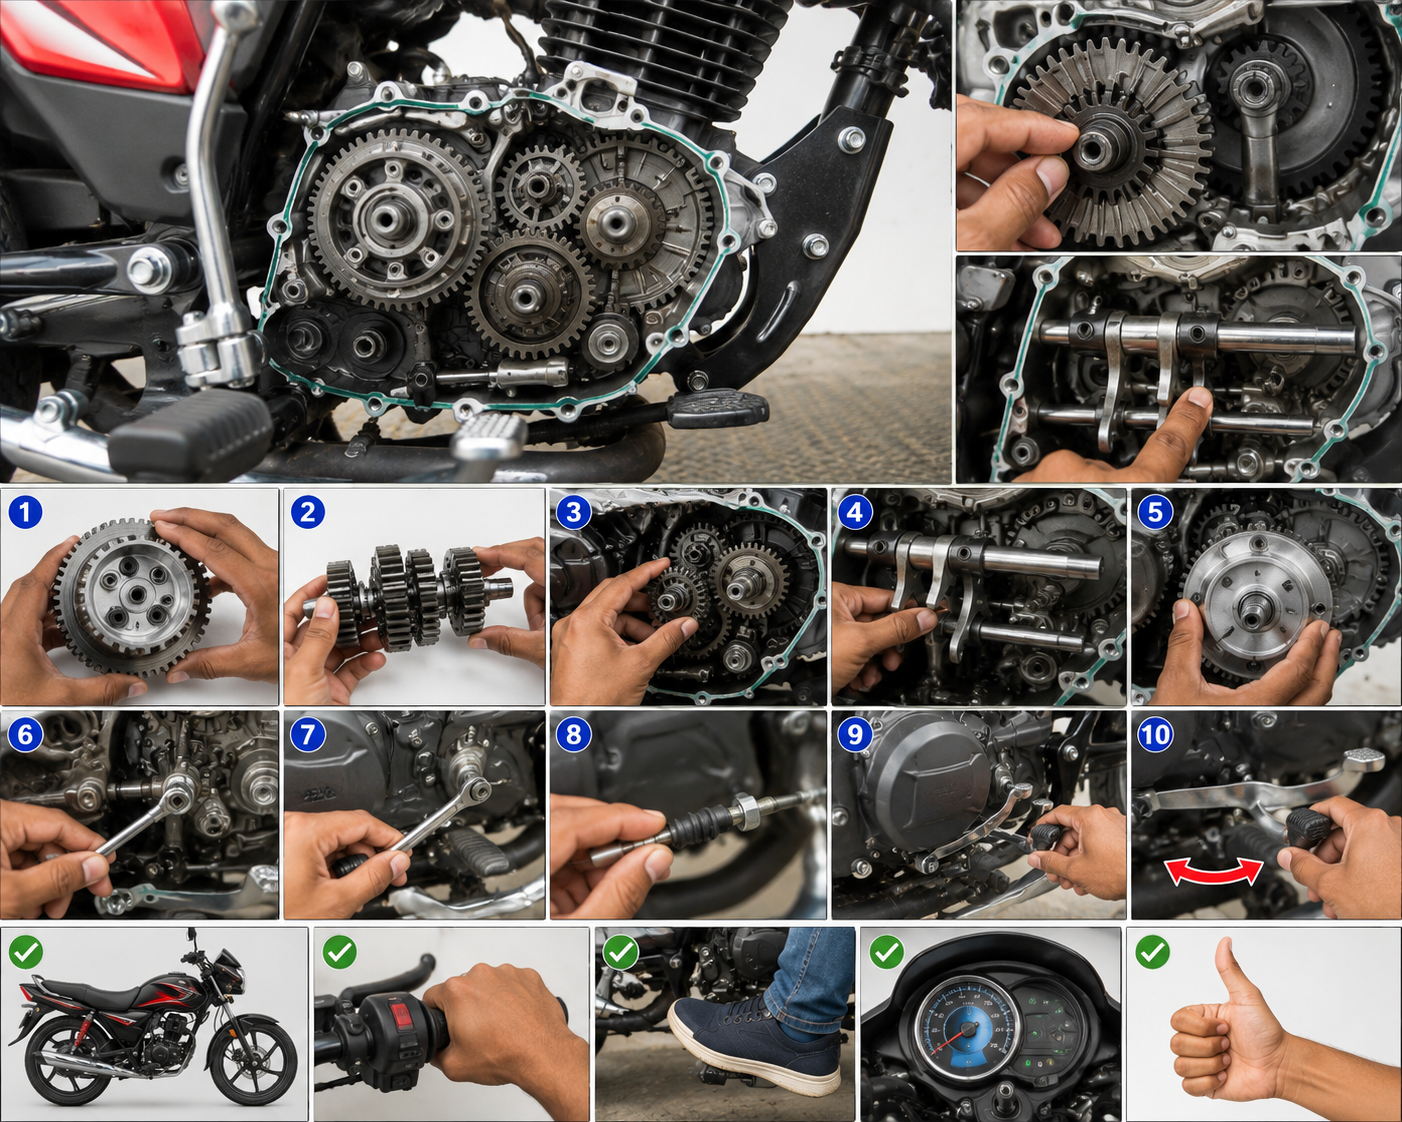
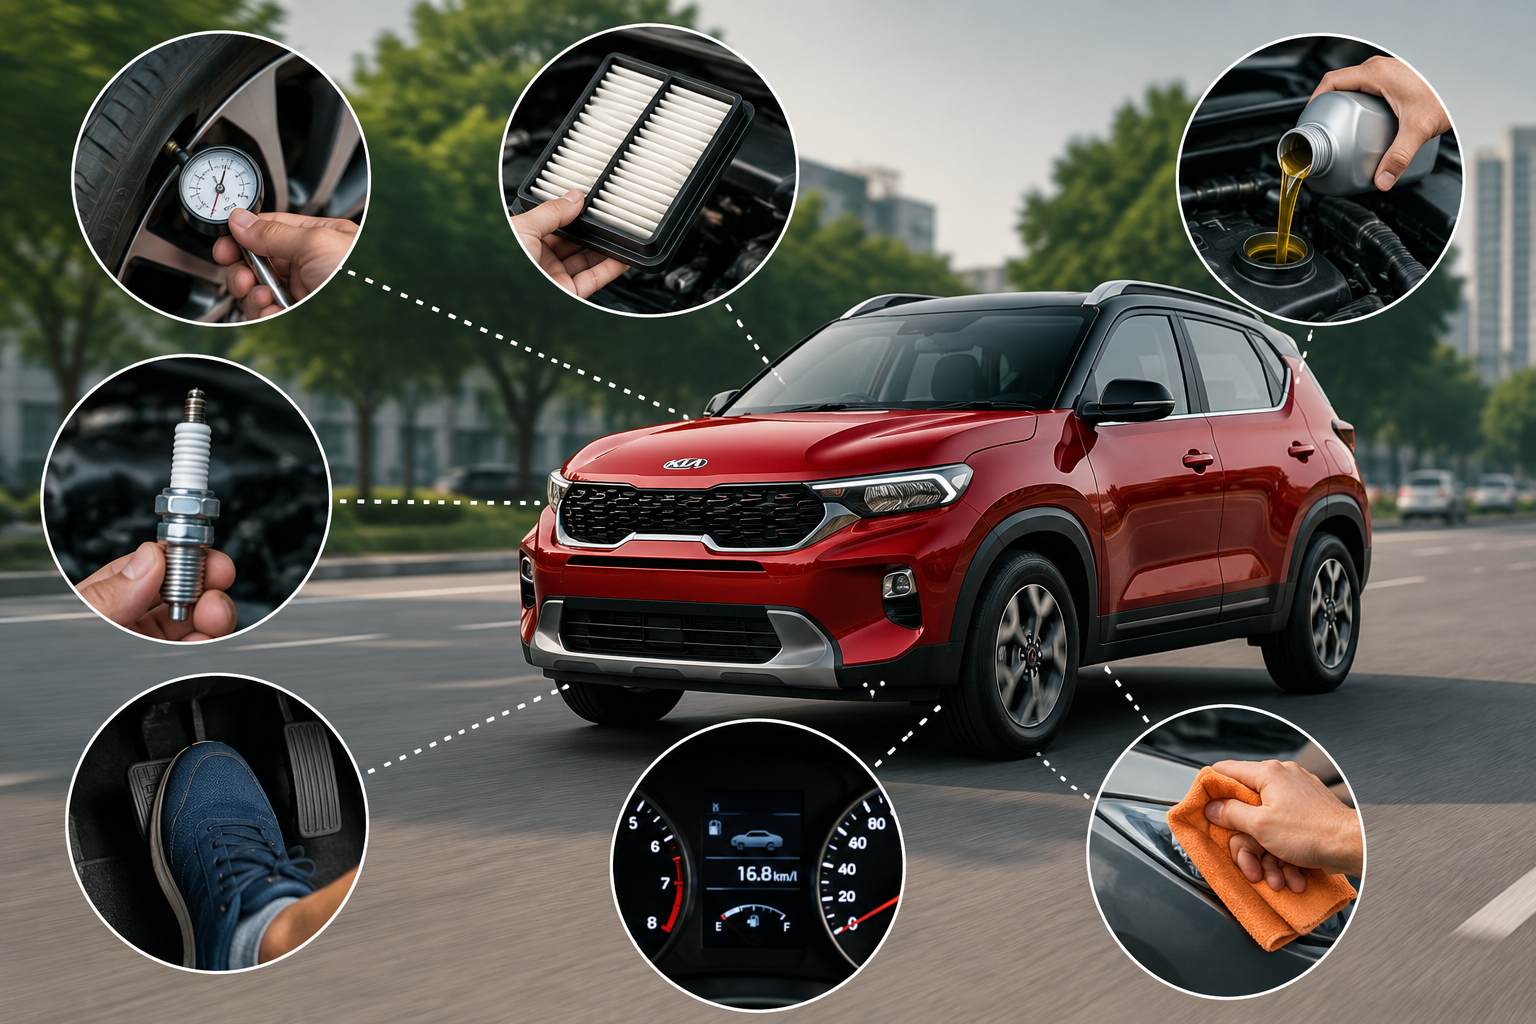
Kia Sonet Mileage Improvement Tips: Complete Guide to Better Fuel Economy

In this guide, we will share actionable tips to improve the mileage of your Kia Sonet

Today, I will explain some practical Kia Sonet mileage improvement tips that can help owners improve fuel efficiency and reduce unnecessary fuel consumption. Whether you drive a petrol, diesel, manual, iMT, or automatic version, the basic principles of improving mileage remain similar: maintain the vehicle correctly, drive smoothly, avoid unnecessary idling, and make sure the engine and tyres are operating properly.

Mileage can vary considerably depending on traffic conditions, road conditions, driving style, vehicle load, air-conditioning usage, tyre pressure, fuel quality, and the condition of the engine and transmission. Therefore, there is no single trick that can dramatically increase mileage overnight. Consistent maintenance and efficient driving habits are the real keys to better fuel economy.


1. Maintain the Correct Tyre Pressure

One of the easiest ways to improve Kia Sonet fuel economy is to maintain the recommended tyre pressure.

When tyre pressure is too low, the tyres have greater rolling resistance. This forces the engine to work harder to move the vehicle and can increase fuel consumption.

Check the tyre pressure regularly, especially before long journeys.

Do not use an unnecessarily high tyre pressure simply to improve mileage. Always follow the recommended tyre-pressure specification provided for your particular Kia Sonet and tyre setup.

Also inspect the tyres for uneven wear. Uneven wear can sometimes indicate incorrect wheel alignment, suspension problems, or incorrect tyre pressure.


2. Drive Smoothly Instead of Aggressively

Aggressive acceleration is one of the common reasons for poor fuel economy.

Repeatedly accelerating hard and then braking heavily wastes energy. In city traffic, this driving style can significantly reduce efficiency.

Try to accelerate progressively.

Instead of suddenly pressing the accelerator, increase throttle input smoothly and allow the vehicle to build speed naturally.

Similarly, look ahead and anticipate traffic. If you can see a red light or slow-moving traffic ahead, gradually reduce speed instead of accelerating hard and then braking immediately.

Smooth driving helps reduce unnecessary fuel consumption.


3. Avoid Excessive Engine Idling

Leaving the engine running while the vehicle is stationary consumes fuel without moving the vehicle.

For example, if you are waiting for someone for an extended period or are stopped for a long time in a safe location, unnecessary idling can reduce overall fuel economy.

However, do not repeatedly switch the engine off and restart it for very short stops where doing so is inappropriate or unsafe.

Use practical judgment based on traffic conditions, safety, weather, and your vehicle’s operating requirements.


4. Use the Air Conditioner Wisely

The air conditioner places an additional load on the engine.

During extremely hot weather, completely avoiding the AC may not be practical, especially in India. Instead, use it efficiently.

Before starting a journey, if the car has been parked in direct sunlight, ventilate the cabin briefly when appropriate and safe. Once the cabin temperature begins to come down, use a comfortable temperature setting rather than continuously operating the system at maximum cooling.

Keep the AC system properly maintained.

A dirty cabin air filter can restrict airflow and make the climate-control system work less efficiently.


5. Replace the Air Filter When Required

The engine requires a proper supply of clean air for efficient combustion.

A severely dirty engine air filter can restrict airflow and affect engine performance.

During routine servicing, inspect the air filter according to the manufacturer’s recommended maintenance schedule and replace it when necessary.

Do not replace the filter excessively early simply because you are trying to increase mileage. The correct replacement interval depends on operating conditions, dust levels, driving environment, and the manufacturer’s recommendations.

Vehicles regularly driven in dusty areas may require more frequent inspection.


6. Keep the Engine Properly Serviced

Regular maintenance is one of the most important factors in maintaining fuel efficiency.

Follow the recommended service schedule for your Kia Sonet.

Important maintenance areas can include:

  • Engine oil
  • Oil filter
  • Air filter
  • Spark plugs on applicable petrol engines
  • Fuel system
  • Coolant
  • Transmission system
  • Brake system
  • Tyres
  • Battery and charging system

A vehicle that is poorly maintained may gradually lose performance and fuel efficiency.


7. Use the Correct Engine Oil

Using the correct engine oil is important for engine protection and efficient operation.

Always use the oil grade and specification recommended for your specific Kia Sonet engine.

Do not select engine oil simply because it is advertised as a “mileage booster.”

The correct viscosity and specification are more important than marketing claims.

Also make sure the engine oil level is correct. Both insufficient and excessive oil levels can create problems.


8. Check Wheel Alignment

Incorrect wheel alignment can increase rolling resistance and cause uneven tyre wear.

If your Sonet pulls to one side, the steering wheel is not centered while driving straight, or the tyres are wearing unevenly, have the alignment checked.

Proper wheel alignment helps the tyres maintain the correct contact with the road.

This can improve handling, tyre life, and overall vehicle efficiency.


9. Avoid Carrying Unnecessary Weight

Extra weight requires additional energy to move the vehicle.

Remove unnecessary heavy objects from the boot and cabin if they are not required.

For example, carrying tools, equipment, or other heavy items every day when they are rarely needed can increase the vehicle’s overall weight.

You do not need to remove essential safety equipment or items required for normal driving. The goal is simply to avoid carrying unnecessary loads.


10. Reduce High-Speed Driving

Driving at very high speeds can reduce fuel economy because aerodynamic resistance increases as speed rises.

If your objective is better mileage, maintain a steady and reasonable cruising speed where traffic and road conditions allow.

Constantly changing speed is also inefficient.

A smooth and consistent driving pattern generally consumes less fuel than repeated acceleration and braking.

Always follow posted speed limits and drive according to road and traffic conditions.


11. Use the Correct Gear

For manual versions of the Kia Sonet, selecting an appropriate gear can help maintain efficient engine operation.

Avoid unnecessarily keeping the engine at very high RPM.

At the same time, do not force the engine to operate at extremely low RPM under heavy load.

The ideal gear depends on road speed, incline, traffic, engine load, and driving conditions.

Learn to recognize the engine’s natural operating range and shift smoothly.


12. Automatic and iMT Driving Tips

Kia Sonet versions equipped with automatic or iMT-type transmissions should be driven smoothly rather than aggressively.

Avoid repeatedly pressing and releasing the accelerator unnecessarily.

Allow the transmission to select an appropriate gear when possible and maintain a steady throttle during normal cruising.

On inclines, do not repeatedly accelerate aggressively just to maintain speed. Use the transmission’s normal operating behavior and drive according to the road conditions.

Never shift into neutral while the vehicle is moving simply as a mileage-saving trick. Maintain proper control of the vehicle and follow safe driving practices.


13. Check the Brake System

A partially sticking brake can increase rolling resistance.

If you notice that the vehicle feels unusually difficult to move, the brakes become excessively hot, or the car does not roll freely, have the braking system inspected.

Possible problems can include:

  • Sticking brake caliper
  • Brake pad binding
  • Parking brake issue
  • Brake hardware problem
  • Wheel bearing problem

Do not ignore unusual brake heat or wheel-related noises.

A brake that is dragging can affect both vehicle performance and fuel economy.


14. Monitor the Check Engine Light

If the check engine light appears on the dashboard, do not ignore it.

A warning light can indicate a problem with the engine-management or emissions system.

Possible causes vary widely and may include sensor problems, ignition issues, fuel-system faults, air-intake problems, or other electronic faults.

A diagnostic scan can help identify stored fault codes.

However, a fault code does not always mean that the related component itself must immediately be replaced. Proper diagnosis is necessary.


15. Keep the Fuel System in Good Condition

A healthy fuel system is important for efficient combustion.

If the vehicle develops symptoms such as rough idling, poor acceleration, hesitation, difficult starting, or unusual fuel consumption, the fuel and engine-management systems should be checked.

Do not rely on unverified fuel additives as a guaranteed method of increasing mileage.

If you suspect a fuel-system problem, have the vehicle properly diagnosed.


16. Check Spark Plugs on Petrol Models

Petrol engines require an effective ignition system.

Worn or fouled spark plugs can affect combustion and engine performance.

If your petrol Kia Sonet is experiencing rough running, hesitation, difficult starting, or a noticeable reduction in fuel economy, the ignition system should be inspected.

Spark plugs should be inspected and replaced according to the correct service requirements for the specific engine.

Do not use an incorrect spark plug simply because it physically fits.


17. Do Not Ignore Diesel Engine Maintenance

For diesel-powered Sonet variants, proper maintenance of the diesel engine and emissions system is especially important.

If you notice excessive smoke, poor acceleration, unusual engine noise, difficult starting, or a significant drop in mileage, the vehicle should be inspected.

Air intake, fuel delivery, injectors, sensors, turbocharger-related systems, and emissions components can all influence engine performance.

Avoid attempting to remove or disable emissions-control equipment simply to improve mileage. Such modifications can create mechanical, legal, safety, and environmental problems.


18. Use a Simple Mileage Test

If you want to know whether your Kia Sonet is actually improving its mileage, do not depend entirely on a single dashboard reading.

A practical method is to record:

  1. Odometer reading
  2. Amount of fuel added
  3. Distance travelled
  4. Driving conditions
  5. Average speed
  6. AC usage

For a more useful comparison, calculate fuel economy over several refills rather than judging it from one short trip.

For example, if you drive mostly in heavy traffic one week and mostly on highways the next week, the mileage difference may be caused by driving conditions rather than a mechanical change.


19. Understand City and Highway Mileage Differences

City driving normally involves frequent acceleration, braking, traffic congestion, and idling.

Highway driving usually allows more consistent speeds and fewer stops.

Therefore, it is normal for fuel economy to differ between city and highway driving.

Short trips can also result in different fuel consumption because the engine may spend more time operating before reaching its normal operating conditions.

Do not immediately assume that the vehicle has a mechanical problem simply because city mileage is lower than highway mileage.


20. Avoid Unnecessary Modifications

Some owners install aftermarket accessories believing they will improve fuel economy.

Be careful with modifications that alter the engine, intake, exhaust, electronics, or fuel-management system.

An incorrect modification can cause poor drivability, warning lights, increased fuel consumption, or long-term mechanical problems.

For a reliable daily-use vehicle, maintaining the original system correctly is usually a better approach than experimenting with unverified mileage modifications.


Common Reasons for Poor Kia Sonet Mileage

If your Kia Sonet is suddenly giving noticeably lower fuel economy, check the following areas:

  • Low tyre pressure
  • Aggressive driving
  • Heavy traffic
  • Excessive idling
  • Excessive AC usage
  • Dirty air filter
  • Incorrect engine oil
  • Poor wheel alignment
  • Brake drag
  • Engine fault
  • Spark plug issues on petrol engines
  • Fuel-system problems
  • Sensor or electronic faults
  • Excessive vehicle load
  • High-speed driving
  • Poor maintenance

The important point is to identify whether the mileage reduction is caused by driving conditions or an actual mechanical problem.


Best Mileage Improvement Routine

For a simple daily routine, follow this approach:

Before driving: Check tyres and make sure there are no obvious warning lights.

During city driving: Accelerate smoothly, anticipate traffic, avoid unnecessary braking, and minimize unnecessary idling.

During highway driving: Maintain a steady legal speed and avoid repeated acceleration.

During servicing: Check engine oil, filters, tyres, brakes, battery, and other maintenance items according to the manufacturer’s schedule.

When mileage suddenly drops: Do not immediately buy fuel additives or replace expensive parts. First identify the actual cause. Read also kawasaki-bike-self-start-problem


Final Thoughts

Improving Kia Sonet mileage is not about using one secret trick. The best results come from combining proper maintenance, correct tyre pressure, smooth driving, sensible AC usage, reduced unnecessary idling, correct engine oil, proper wheel alignment, and timely diagnosis of mechanical or electronic problems.

If your Sonet is running normally but the mileage is lower than expected, first examine your driving conditions and habits. If the mileage has suddenly decreased without any change in your normal driving pattern, the vehicle should be inspected for possible maintenance or mechanical problems.

Remember that actual fuel economy varies according to engine type, transmission, traffic, road conditions, vehicle load, weather, tyre condition, AC usage, and driving style.

A well-maintained vehicle driven smoothly will generally provide better efficiency and a more reliable driving experience.

I hope these Kia Sonet mileage improvement tips help you understand how to improve fuel economy through practical maintenance and responsible driving. For more practical car repair guides, motorcycle troubleshooting articles, engine maintenance tips, and workshop knowledge, keep visiting Rajesh Technical Giyan.
📲

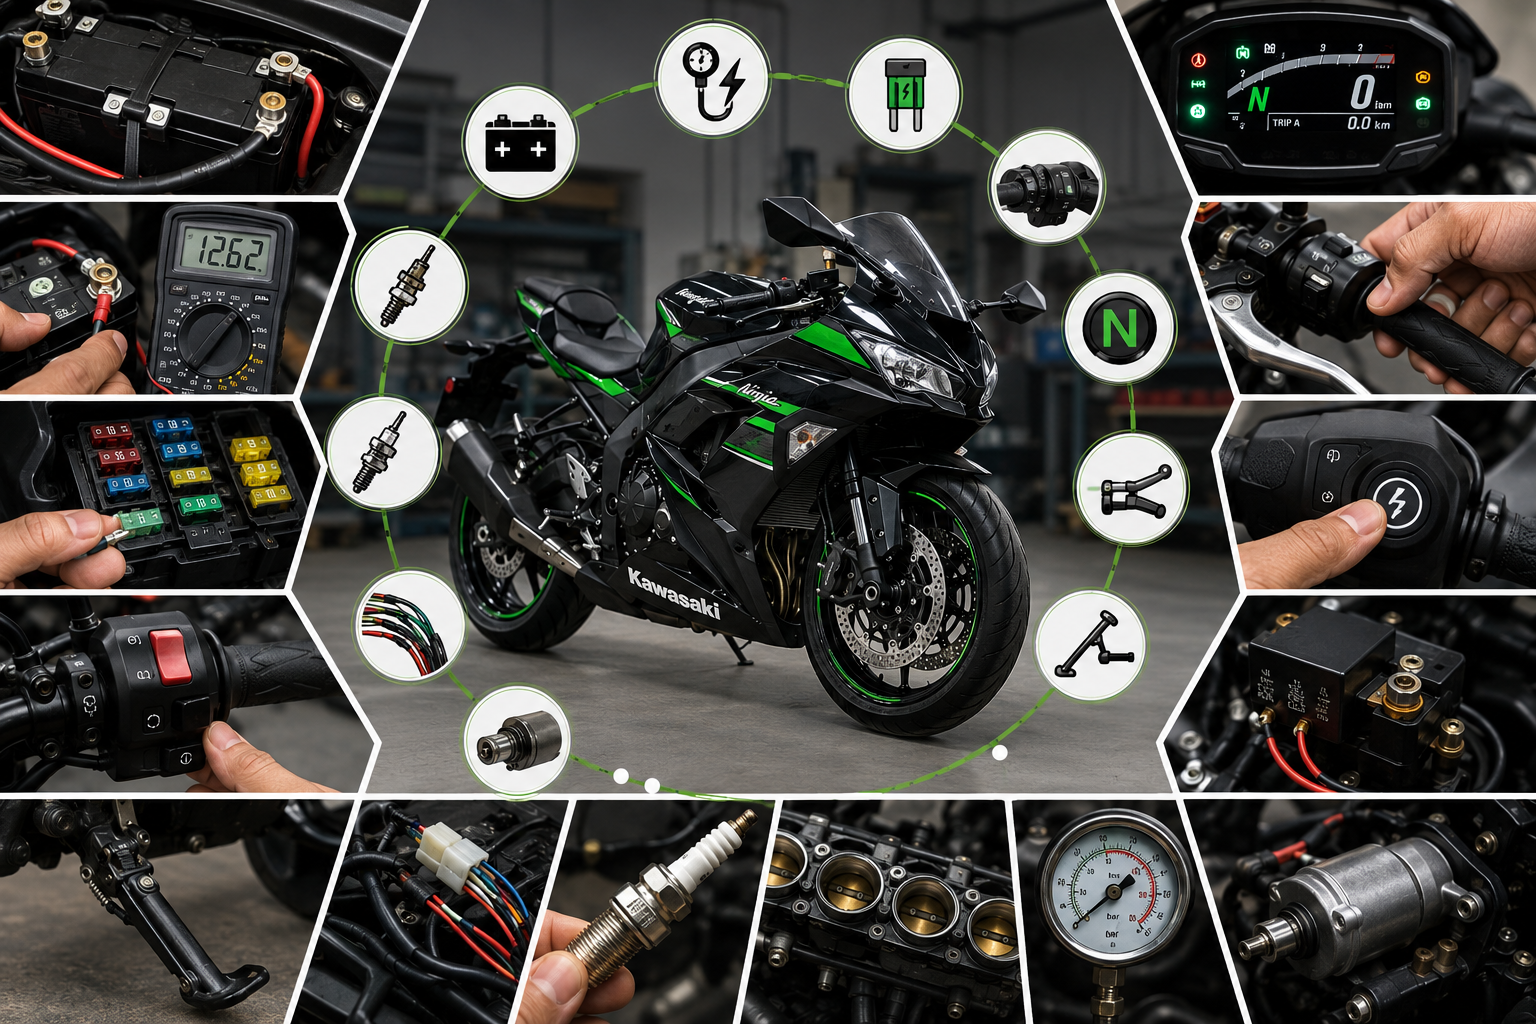
Kawasaki Bike Self-Start Problem: Step-by-Step Solution Guide

In this guide we explain the step-by-step method to diagnose and resolve the self-start issue on a Kawasaki bike, so that riders and beginner mechanics can understand the complete troubleshooting process

A motorcycle that does not start with the electric starter can have several possible causes. Sometimes the problem is as simple as a weak battery or loose battery terminal. In other cases, the problem may come from the starter relay, starter motor, ignition switch, clutch switch, side-stand switch, neutral switch, wiring connection, fuse, or even an engine-related issue.

Therefore, replacing parts randomly is not a good repair method. A proper diagnosis should always begin with the simplest checks and gradually move toward more complicated components.


Understanding the Kawasaki Self-Start System

Before diagnosing the problem, it is important to understand how the electric starting system works.

When you press the self-start button, the motorcycle’s electrical control system checks several safety conditions. Depending on the specific Kawasaki model, these may include the ignition switch, engine stop switch, neutral switch, clutch switch, and side-stand switch.

If the required conditions are satisfied, electrical power is supplied to the starter relay. The starter relay then allows high current to flow toward the starter motor. The starter motor rotates the engine through the starter mechanism, allowing the engine to begin its combustion cycle.

This means that a self-start problem does not necessarily mean that the starter motor itself is defective.


Step 1: Check the Battery First

The battery should be the first component checked because the starter motor requires substantial electrical current.

Turn the ignition ON and observe the instrument cluster, headlight, indicators, and other electrical components.

If the dashboard becomes very dim when you press the starter button, or you hear repeated clicking from the relay, the battery may be weak or discharged.

A multimeter can be used to check battery voltage. Measure the voltage directly across the positive and negative battery terminals.

A healthy fully charged motorcycle battery will normally show a voltage around the mid-12-volt range when the engine is switched off, although exact readings depend on battery condition, temperature, and the motorcycle’s electrical system.

Do not judge battery condition from voltage alone. A battery may show reasonable voltage without being capable of delivering sufficient cranking current.

If the battery is weak, charge it using an appropriate motorcycle battery charger or test it with suitable battery-testing equipment.


Step 2: Inspect the Battery Terminals

After checking the battery, inspect both terminals carefully.

A loose or corroded battery connection can prevent sufficient current from reaching the starter motor.

Check:

  • Positive battery terminal
  • Negative battery terminal
  • Battery cable connections
  • Ground connection to the chassis
  • Engine ground connection
  • Signs of corrosion or overheating

Clean dirty terminals and tighten the connections properly.

Never ignore the negative ground cable. A poor ground connection can produce symptoms that look like a defective starter motor or relay.


Step 3: Check the Main Fuse and Other Fuses

The next step is to inspect the motorcycle’s fuses.

A blown fuse can interrupt electrical power to the starting system or related control circuits.

Locate the fuse box according to the motorcycle’s service information and inspect the relevant fuse.

Do not simply replace a repeatedly blown fuse with another fuse of a higher rating. The correct fuse rating specified for the motorcycle should always be used.

If a replacement fuse immediately blows again, there may be a short circuit or another electrical fault that needs to be diagnosed.


Step 4: Check the Engine Stop Switch

Many riders overlook the engine stop switch.

Make sure the engine stop switch is in the RUN position.

If the switch is in the OFF position, the motorcycle may not start even though the battery, starter motor, and other components are working normally.

If the switch feels loose, damaged, or operates inconsistently, inspect the switch and its wiring.


Step 5: Check the Neutral Indicator

Put the motorcycle into neutral and check whether the neutral indicator operates normally.

The neutral switch is an important part of the starting safety circuit on many motorcycles.

If the motorcycle is actually in neutral but the neutral indicator does not illuminate, inspect the neutral switch, wiring, connector, and related circuit.

However, do not assume that a neutral light problem is always the cause of the starting issue. Some models use multiple safety inputs and may permit starting under different conditions.


Step 6: Check the Clutch Switch

The clutch switch is another important component in the motorcycle starting circuit.

On many motorcycles, pulling the clutch lever is required before the starter can operate when the transmission is not in neutral.

Pull the clutch lever fully and press the starter button.

If the starter works only when the lever is moved to a particular position, the clutch switch or its adjustment may require inspection.

Check the switch connector and wiring for damage, loose connections, dirt, or corrosion.


Step 7: Inspect the Side-Stand Switch

A faulty side-stand switch can also cause starting or running problems.

The side-stand safety system is designed to prevent unsafe operation under certain conditions.

Move the side stand completely upward and check whether the motorcycle responds normally.

Inspect the side-stand switch and its wiring for physical damage, contamination, loose connectors, or broken wires.

Do not permanently bypass a safety switch simply to make the motorcycle start. These systems are installed for rider safety, and the correct repair is to diagnose and repair the fault according to the motorcycle’s service procedure.


Step 8: Listen to the Starter Relay

Now pay attention to what happens when you press the self-start button.

There are several common situations.

No Sound at All

If there is absolutely no sound when pressing the starter button, investigate the control side of the starting circuit.

Possible causes include:

  • Starter switch problem
  • Ignition switch problem
  • Fuse problem
  • Clutch switch problem
  • Neutral switch problem
  • Side-stand switch problem
  • Wiring fault
  • Starter relay control problem

Single Click

A single click may indicate that the starter relay is receiving a command but the starter motor is not turning.

Possible causes include:

  • Weak battery
  • Poor battery connection
  • Poor ground connection
  • Faulty starter relay
  • Starter motor problem
  • High resistance in the starter circuit

Rapid Clicking

Rapid clicking commonly indicates insufficient voltage or current reaching the starter system, although proper testing is necessary before replacing components.


Step 9: Inspect the Starter Relay

The starter relay acts as a high-current electrical switch between the battery and starter motor.

If the relay receives the correct control signal but does not deliver battery power to the starter motor, the relay may be defective.

A technician should use a multimeter or suitable electrical test equipment to verify the relay input, control signal, and output.

Do not randomly short electrical terminals with tools. Incorrect testing can cause sparks, electrical damage, or injury.


Step 10: Check the Starter Motor

If battery voltage and the starting circuit are functioning correctly but the starter motor does not rotate, the starter motor should be inspected.

Possible starter motor problems include:

  • Worn brushes
  • Dirty commutator
  • Internal electrical failure
  • Damaged bearings or bushings
  • Excessive internal resistance
  • Mechanical seizure

A professional technician can remove the starter motor and inspect it according to the service manual.

If the starter motor is repairable, worn components can be replaced where appropriate. Otherwise, the motor may need replacement.


Step 11: Inspect the Wiring and Connectors

Electrical connectors are often overlooked during motorcycle troubleshooting.

Inspect the wiring from the battery toward the starter relay and starter motor.

Look for:

  • Broken wires
  • Loose connectors
  • Corrosion
  • Burn marks
  • Water entry
  • Damaged insulation
  • Poor ground connections
  • Previous repair work

A wire can appear normal from outside but still have an internal break or high resistance.

Use a wiring diagram and multimeter for accurate diagnosis rather than guessing.


Step 12: Check the Starter Button

If the starter motor and relay are healthy but the starter does not respond when the button is pressed, inspect the starter switch.

Dirt, moisture, corrosion, or worn internal contacts can prevent the switch from sending the required signal.

Carefully inspect the switch assembly and connector.

Do not use excessive force or unsuitable chemicals inside electrical switchgear.


Step 13: Check Engine Mechanical Condition

If the starter motor rotates the engine normally but the Kawasaki still does not start, the problem may no longer be a self-start electrical problem.

At this stage, investigate the engine’s basic requirements:

Air + Fuel + Spark + Compression + Correct Timing

Check whether the engine is receiving the correct fuel supply.

Then inspect the ignition system and spark plug according to the manufacturer’s service procedure.

If necessary, perform a compression test.

Low compression can be caused by valve-related problems, piston-ring wear, cylinder problems, head-gasket failure, or other mechanical issues.

Correct ignition and valve timing should also be verified if the engine has recently been repaired or if there are symptoms suggesting a timing problem.


Step 14: Use Diagnostic Equipment When Required

Modern Kawasaki motorcycles may contain electronic control systems that require diagnostic equipment for certain faults.

If the motorcycle has an engine warning light or stored diagnostic fault, a compatible diagnostic scanner can help identify the affected system.

However, a diagnostic code should not automatically be interpreted as proof that a particular component must be replaced.

The code is a starting point for diagnosis. Wiring, connectors, power supply, ground, sensors, and related components should also be checked.


Common Causes of Kawasaki Self-Start Problems

The most common causes can be summarized as follows:

  1. Weak or discharged battery
  2. Loose battery terminal
  3. Corroded ground connection
  4. Blown fuse
  5. Faulty starter relay
  6. Damaged starter button
  7. Clutch switch problem
  8. Neutral switch problem
  9. Side-stand switch problem
  10. Wiring or connector fault
  11. Faulty starter motor
  12. Ignition or engine-management issue
  13. Fuel delivery problem
  14. Spark plug or ignition problem
  15. Low engine compression

The important point is that the exact cause depends on the motorcycle model and the symptoms.


A Practical Diagnostic Sequence

When a Kawasaki motorcycle has a self-start problem, I recommend following this logical sequence:

Battery → Battery terminals → Ground → Fuse → Engine stop switch → Neutral/clutch/side-stand safety switches → Starter button → Starter relay → Starter motor → Wiring → Engine fuel/spark/compression diagnosis

This sequence helps prevent unnecessary replacement of expensive components.


Important Safety Precautions

Always work in a well-ventilated area and keep the motorcycle securely supported.

Keep sparks, cigarettes, and open flames away from the battery and fuel system.

Use the correct tools and follow the manufacturer’s service information for your exact Kawasaki model.

Disconnect the battery when performing repairs that require it, while remembering that some motorcycles may have specific procedures for electrical or electronic systems.

Never bypass safety systems permanently just to make the motorcycle start.

If you are not comfortable working with high-current electrical circuits, seek help from a qualified motorcycle technician.read also how-to-check-head-air-compressor-mahindra-scorpio


Final Thoughts

A Kawasaki bike that does not self-start should not immediately be assumed to have a bad starter motor. The starting system contains several electrical, mechanical, and safety-related components, and a failure in any one of them can prevent normal starting.

The best repair method is systematic diagnosis. Start with the battery and its connections, then move through the fuses, switches, wiring, starter relay, and starter motor. If the starter motor turns the engine but the engine does not actually start, move on to fuel, spark, compression, and timing diagnosis.

With a multimeter, basic tools, a wiring diagram, and the correct service information, many starting faults can be identified much more accurately.

I hope this Kawasaki self-start troubleshooting guide helps riders, DIY enthusiasts, and beginner mechanics understand how to diagnose starting problems without replacing parts unnecessarily.

For more practical motorcycle repair guides, engine troubleshooting methods, maintenance information, and workshop tips, keep visiting Rajesh Technical Giyan.
How to Check Mahindra Scorpio Head Air Compressor

How to Check Head Air Compressor in Mahindra Scorpio: A Step-by-Step Diagnostic Guide

Your Mahindra Scorpio relies on its air compressor for key functions like engaging 4WD or keeping the suspension firm. When this part fails, you might notice the vehicle sagging or trouble shifting into all-wheel drive. This guide walks you through checking the head air compressor step by step so you can spot problems early and avoid bigger repairs.

In this technical walkthrough, we will cover the factory-standard diagnostic tests, safety precautions while handling pressured lines, and how to identify worn-out valves or gaskets in the compressor head. Whether you are troubleshooting off-road performance or a stiff ride, these clear steps will give you the precision needed to fix it right.

Your Mahindra Scorpio relies on its air compressor for key functions like engaging 4WD or keeping the suspension firm. When this part fails, you might notice the vehicle sagging or trouble shifting into all-wheel drive. This guide walks you through checking the head air compressor step by step so you can spot problems early and avoid bigger repairs.

 Understanding the Importance of the Scorpio’s Air Compressor System

The air compressor in your Mahindra Scorpio powers systems that make off-road trips smooth and safe. In models with 4×4 or air suspension, it builds pressure to lock the differentials or adjust ride height. A bad compressor can leave you stuck in two-wheel drive or with a low-slung vehicle that scrapes on bumps.

Common signs of trouble include loud humming that doesn’t stop or slow engagement when you hit the 4WD button. You may also hear air hissing from leaks or see the suspension drop after parking. This article gives you a clear DIY process to diagnose the head air compressor, helping you decide if it’s a quick fix or time for a shop visit.

Owners often ignore these issues until they worsen, leading to costly towing. By following these steps, you gain control over your Scorpio’s performance. Let’s start with spotting the warning signs.

Section 1: Identifying Symptoms of a Failing Air Compressor

Spotting problems early saves time and money on your Scorpio. Pay attention to how the vehicle feels and sounds during normal drives. These clues point straight to the air compressor system.

Recognizing Auditory and Performance Indicators

Listen for unusual noises from the engine bay when you start the Scorpio or engage 4WD. A healthy compressor makes a short, steady whir that lasts about 10-15 seconds as it builds pressure. If you hear grinding or a high-pitched whine that drags on, the motor might be straining against worn parts.

Excessive noise often means the compressor cycles too much without hitting full pressure. For example, if it runs constantly during a drive, check for low air levels first. A loose drive belt can cause minor rattles, but grinding signals deeper issues like seized pistons inside the unit.

Test the response time next. Press the 4WD button and note if the light comes on within five seconds. Slow or no response suggests the compressor isn’t delivering air fast enough. Track these symptoms over a few drives to confirm the pattern.

  • Quick Check: Park on a flat spot and cycle the suspension or 4WD. Time how long the compressor runs.
  • Normal Range: Expect 120-150 PSI in under 30 seconds for most Scorpio models.
  • Red Flag: If noise persists after cooling down, stop driving and inspect right away.

Visual Inspection and Warning Lights

Look at your dashboard for lights tied to the air system. In Scorpios with electronic 4×4, a flashing “AWD” or “Suspension Fault” icon often links to compressor pressure drops. These warnings activate when the system detects low air below 100 PSI.

Check under the vehicle too. Sagging at one corner or uneven height points to air loss from the compressor or lines. Walk around after a short drive and measure the ground clearance with a tape—aim for even levels across all wheels.

One common case happens on rough roads: the AWD light blinks as pressure falls, forcing the system to default to 2WD. This protects the drivetrain but leaves you less traction. Note the light’s behavior in your log to share with a mechanic later.

  • Dashboard Scan: Turn the key to “on” without starting. Cycle through warning menus if your model has them.
  • Visual Cue: Oil spots or dust buildup near the compressor housing can hide cracks.
  • Tip: Clean the area first for a clear view of any damage.

Section 2: Locating and Accessing the Air Compressor Unit

Finding the compressor takes a few minutes but sets you up for safe work. Its spot varies by Scorpio generation, so know your model’s year. Most units sit in the engine compartment for easy access.

Pinpointing the Compressor Location in Various Scorpio Models

In older Scorpios from 2006-2014, look near the firewall on the passenger side of the engine bay. Newer ones, like the 2017 NXG series, often mount it under the vehicle near the rear axle for better cooling. The head air compressor— the main unit that feeds the system—connects to air lines and a small tank.

Pull up your owner’s manual for a diagram specific to your trim. Search online for “Mahindra Scorpio [year] air compressor location” if the manual is missing. This avoids guesswork and wrong parts.

Once located, note nearby components like the relay box or wiring. The unit looks like a small electric pump, about the size of a coffee can, with black plastic housing and hoses running out.

Safety Precautions Before Inspection

Park on level ground and engage the parking brake. Chock the wheels with blocks to keep the Scorpio steady. Let the engine cool for at least 30 minutes to avoid burns from hot parts.

Disconnect the negative battery cable if you plan electrical tests. This prevents shocks or accidental starts. Wear gloves and eye protection—air systems can release pressure suddenly.

Work in good light, and keep a fire extinguisher nearby since fuel lines run close. If the vehicle has been off-road, clear mud from the underbody first.

  • Battery Step: Use a 10mm wrench to loosen the terminal. Tape the end away from the post.
  • Cool-Down Wait: Components can hit 200°F; test with your hand from a distance.
  • Tool Kit: Grab a flashlight, sockets, and pliers for access panels.

Section 3: Initial Electrical and Power Checks

Start with power issues, as they cause most compressor no-starts. These tests use basic tools and take under 20 minutes. Focus on the circuit feeding the unit.

Testing Compressor Power Supply

Open the fuse box under the hood or dash—check your manual for the layout. Locate the 20-30 amp fuse labeled “Air Suspension” or “4×4 Compressor.” Pull it out and inspect for burns or breaks.

Use a multimeter set to volts. Probe the fuse terminals with the key on; you should read 12V on both sides. If not, trace back to the battery for loose connections.

For the relay, it’s often in the same box, marked “Compressor Relay.” Swap it with the horn relay—a like part—and test if the compressor kicks on. No change means the relay is good; replace if faulty.

  • Multimeter Use: Set to 20V DC. Touch red lead to positive, black to ground.
  • Expected Reading: Steady 12-14V from a charged battery.
  • Common Fix: Clean corroded fuse contacts with a brush before reinserting.

Verifying Sensor and Wiring Integrity

The pressure sensor near the compressor tells the ECU when to stop the motor. If it’s faulty, the unit won’t run. Unplug the sensor connector and look for bent pins or green corrosion.

Inspect wires from the compressor to the frame. Tug gently for frays, especially where they rub against the chassis. In wet climates, water can seep in and short circuits.

Clean connections with electrical contact spray if dirty. Reconnect and test—sometimes this alone revives the system.

  • Visual Scan: Follow the harness for 2-3 feet in each direction.
  • Sensor Test: Use the multimeter on ohms to check continuity if you have the specs.
  • Pro Tip: Label wires before pulling to avoid mix-ups.

Section 4: Diagnostic Testing of Compressor Functionality

Now test the compressor itself. These steps confirm if it builds air or needs replacement. Gather a pressure gauge from an auto parts store.

Measuring System Pressure Output

Attach the gauge to the air line outlet, usually after the dryer’s Schrader valve. Start the engine and trigger the system—raise suspension or engage 4WD. Watch the gauge climb.

A good compressor reaches 140 PSI in 20-40 seconds. Below 100 PSI after a minute means weak output. Shut off and note the drop rate; fast loss points to leaks elsewhere.

Compare to your model’s spec—Scorpios typically run 120-160 PSI for optimal performance.

  • Gauge Setup: Screw on tightly; use thread tape if it leaks.
  • Time It: Use a phone timer for accuracy.
  • Threshold: Under 110 PSI under load? Plan for rebuild or swap.

Assessing Compressor Cycling and Motor Health

Bypass the ECU for a direct test: connect jumper wires from the battery to the compressor terminals. It should spin up smoothly for 10-20 seconds before you cut power.

If it hums but doesn’t turn, the motor is seized. Feel for vibration—strong shake without air means internal blockage. Draw over 15 amps? That’s a sign of failure.

Do this only with the battery disconnected from the vehicle first. Stop if you smell burning.

  • Jumper Wires: Use 12-gauge with clips; keep away from moving parts.
  • Caution: Wear gloves; sparks can ignite fumes.
  • Result Guide: Free spin with air? Unit is likely fine. No spin? Call a tech.

Section 5: Common Related Component Failures

Compressors don’t fail alone often. Check linked parts to rule out secondary causes. This keeps your diagnosis sharp.

The Role of the Air Dryer and Filter

The dryer removes moisture to prevent rust in lines. A clogged one starves the compressor, forcing it to overwork. Open the housing and pull the filter—replace if it’s packed with dirt or oil residue.

In dusty areas, filters clog every 20,000 miles. Clean the dryer screen with compressed air, but swap the element yearly. This simple step can boost pressure by 20-30 PSI.

Inspect for cracks in the dryer body; water buildup leads to compressor corrosion over time.

  • Access: Unscrew four bolts; catch any loose moisture.
  • Replacement Cost: Under $50 for OEM parts.
  • Maintenance: Check during oil changes.

Checking for Air Leaks in the System

Pressurize the system, then spray soapy water on hoses, valves, and fittings. Bubbles show escape points. Focus on connections at the tank and bags.

A pinhole leak drops pressure in minutes, making the compressor run non-stop. Tighten fittings or use thread sealant for minor spots. Big leaks need new lines.

Listen for hisses with your ear close—quiet ones hide without soap.

Conclusion: 

Interpreting Results and Next Steps

Run through these checks in order: power first, then pressure, and leaks last. If power flows but no air builds, suspect the compressor motor or valves. No power at all? Dig into fuses, relays, or wiring.

Key steps stand out: test for power with a multimeter, measure PSI output, and listen for load noise. These confirm if your Scorpio’s head air compressor is shot.

Grab tools and tackle this yourself for peace of mind. If tests show internal damage, head to a Mahindra dealer—they handle warranty work best. Drive safe and keep your Scorpio running strong.

Hello friends! If you liked this technical guide, please be sure to share it with your friends. If you have any questions, feel free to leave a comment or send me an email—I’ll be happy to provide full guidance. Thank you!

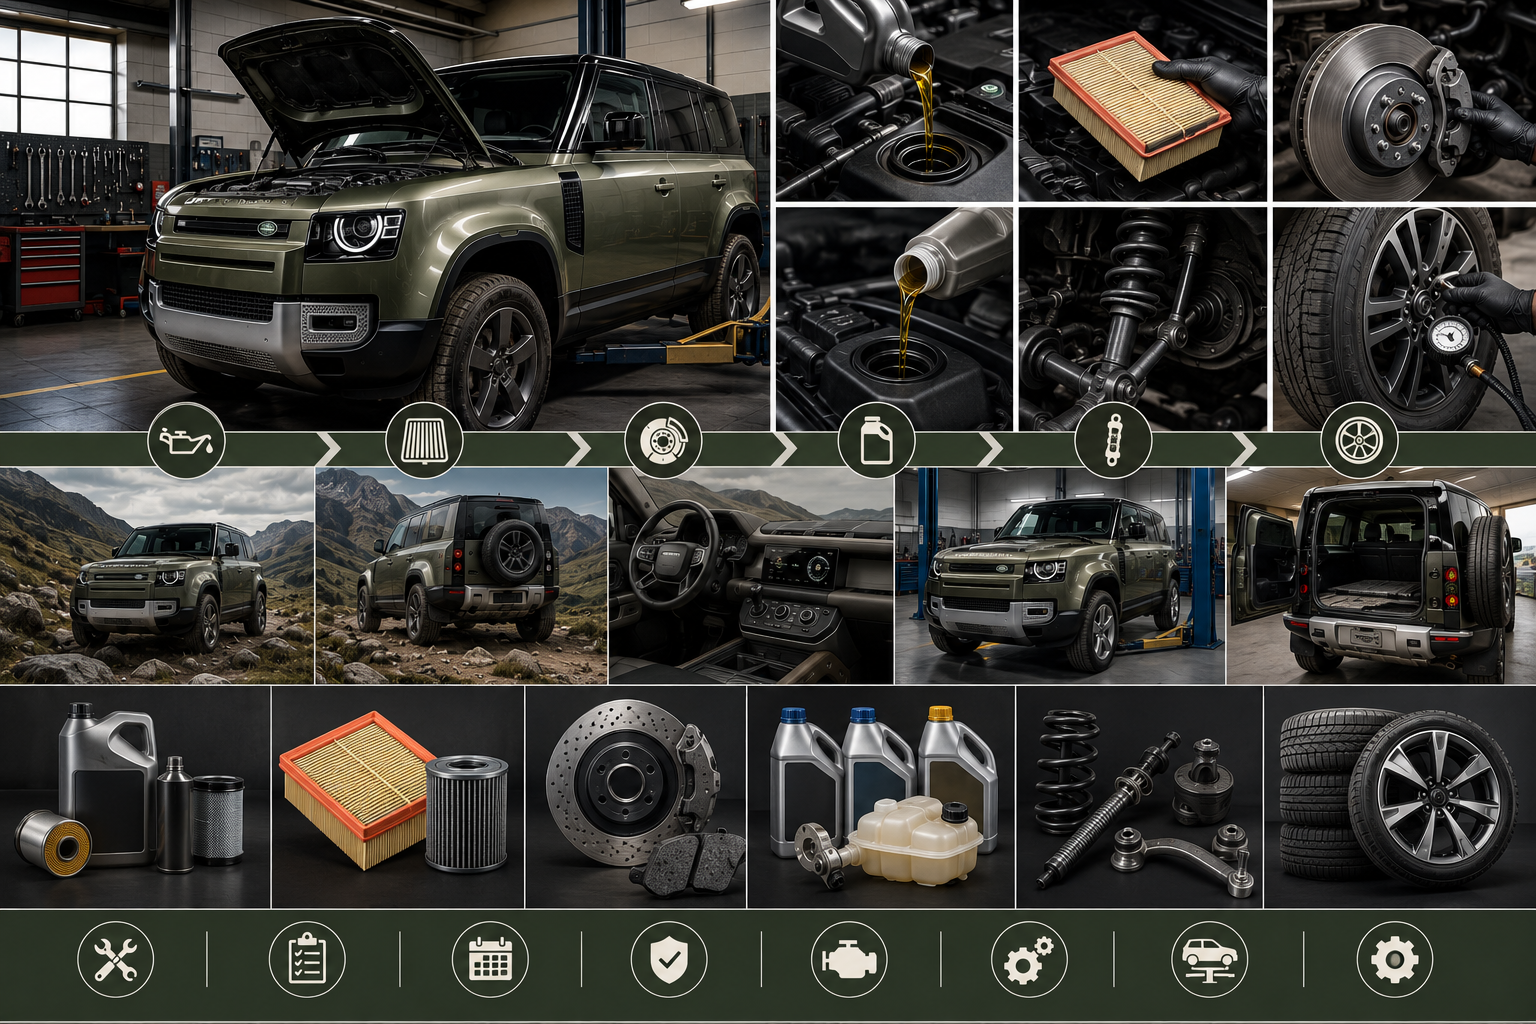
Defender Servicing and Maintenance Guide: Step-by-Step Ideas


 Whether you use your Defender for daily driving, long highway trips, or off-road adventures, regular maintenance is the key to keeping it powerful, reliable, and road-ready for years to come.

The Land Rover Defender is known for its rugged power, luxury comfort, and off-road capability. Whether you use it for city driving, highway travel, towing, or adventure trips, proper servicing and maintenance are essential to keep your Defender running smoothly for years.

Many owners ignore small warning signs, and later they face expensive repair bills. Regular maintenance not only improves performance but also increases fuel efficiency, engine life, resale value, and driving safety.

In this comprehensive technical guide, we will dive deep into factory-recommended fluid change intervals, heavy-duty 4×4 suspension checks, electronic terrain management diagnostics, and critical component inspections to prevent breakdowns and keep your luxury SUV in top off-road condition.


Why Regular Defender Maintenance Matters

Modern Defenders are built with advanced electronics, turbocharged engines, air suspension systems, and intelligent driving technology. Without regular maintenance, these systems can develop problems over time.

Benefits of proper servicing include:

  • Better engine performance
  • Longer transmission life
  • Improved fuel economy
  • Reduced repair costs
  • Better off-road reliability
  • Increased resale value
  • Safer driving experience

A well-maintained Defender can easily handle long-distance travel, mountain roads, muddy trails, and extreme weather conditions.


Step 1: Check Engine Oil Regularly

Engine oil is the lifeblood of your Defender.

Dirty or low engine oil can damage internal engine components and reduce turbocharger life. Experts recommend checking oil levels every few weeks, especially before long trips.

Important Tips:

  • Use manufacturer-recommended synthetic oil
  • Replace oil and filter on time
  • Never ignore oil warning lights
  • Check for oil leaks under the vehicle

For heavy towing or off-road use, oil changes may be needed more frequently.


Step 2: Inspect the Cooling System

The Defender’s engine generates significant heat, especially during summer driving or off-road adventures.

A weak cooling system can lead to overheating and engine failure.

Cooling System Maintenance:

  • Check coolant levels regularly
  • Inspect radiator hoses for cracks
  • Clean radiator fins
  • Replace old coolant when recommended
  • Watch temperature gauge carefully

Ignoring overheating signs can cause very expensive engine repairs.


Step 3: Maintain the Air Suspension System

Many modern Defenders come with advanced air suspension systems that improve comfort and off-road capability.

However, air suspension components can wear out over time.

Common Air Suspension Checks:

  • Listen for unusual compressor noise
  • Inspect for uneven vehicle height
  • Check for suspension warning lights
  • Examine air lines for leaks

Early servicing helps avoid complete suspension failure.


Step 4: Tire Inspection and Rotation

Tires play a major role in handling, fuel economy, braking, and off-road safety.

Defender owners often drive on rough terrain, which causes uneven tire wear.

Tire Maintenance Tips:

  • Rotate tires regularly
  • Check tire pressure weekly
  • Inspect tread depth
  • Align wheels if steering feels uneven
  • Replace damaged tires immediately

Proper tire care also improves highway comfort and fuel efficiency.


Step 5: Brake System Maintenance

A heavy SUV like the Defender requires strong braking performance.

Worn brake pads or damaged rotors can reduce stopping power and increase accident risk.

Brake Inspection Checklist:

  • Listen for squeaking sounds
  • Check brake fluid levels
  • Inspect brake pads and rotors
  • Test parking brake function
  • Replace worn components quickly

Never ignore vibration while braking.


Step 6: Battery and Electrical System Check

Modern luxury SUVs depend heavily on electronic systems.

Weak batteries can create multiple warning lights and starting issues.

Battery Care Ideas:

  • Clean battery terminals
  • Test battery voltage
  • Inspect charging system
  • Replace old batteries before winter
  • Check wiring connections

Electrical issues in luxury vehicles can become expensive if ignored.


Step 7: Transmission Service

The Defender’s automatic transmission requires clean fluid and proper servicing for smooth performance.

Transmission repairs are among the most expensive SUV repairs in America.

Transmission Maintenance:

  • Check transmission fluid condition
  • Avoid aggressive driving habits
  • Service transmission on schedule
  • Watch for delayed shifting
  • Never ignore transmission warning lights

Smooth gear shifting is a sign of a healthy transmission system.


Step 8: Replace Air Filters

Dirty air filters reduce engine airflow and fuel efficiency.

Cabin air filters also affect interior air quality.

Replace Filters If:

  • Fuel economy drops
  • Engine feels sluggish
  • Dust enters cabin easily
  • Bad odors appear inside vehicle

Clean airflow improves both comfort and engine performance.


Step 9: Keep Software Updated

Modern Defenders use advanced onboard computers and software systems.

Manufacturers often release updates to improve performance, safety, and system reliability.

Software Update Benefits:

  • Better fuel management
  • Improved infotainment performance
  • Enhanced driving assistance features
  • Fewer electronic glitches

Always check for official service updates.


Step 10: Wash and Protect the Undercarriage

Mud, road salt, and moisture can damage the underside of the vehicle.

This is especially important in snowy American states.

Undercarriage Protection Tips:

  • Wash after off-road trips
  • Remove salt buildup in winter
  • Inspect for rust regularly
  • Apply rust protection coating if needed

Rust prevention helps extend vehicle lifespan.


Common Defender Problems Owners Should Watch For

Some Defender owners report issues such as:

  • Suspension faults
  • Electronic warning lights
  • Battery drain
  • Oil leaks
  • Coolant leaks
  • Transmission hesitation

Early diagnosis can prevent major repair costs.


Best Maintenance Habits for Long Defender Life

To keep your Defender reliable:

  • Follow service intervals strictly
  • Use quality replacement parts
  • Avoid delaying repairs
  • Perform inspections before road trips
  • Keep maintenance records organized

Good maintenance habits save thousands of dollars over time.read also engine-oil-the-blood-of-your-motorcyc


Final Thoughts

The is built for adventure, luxury, and durability. But like every premium SUV, it needs proper servicing and regular care.

Simple maintenance steps can prevent major mechanical failures and keep your Defender powerful, reliable, and ready for every journey.

Whether you drive through busy American highways, snowy roads, deserts, or off-road trails, proper maintenance is the key to long-term performance and peace of mind.

Friends, if you found this technical guide helpful, please feel free to share it with your fellow riders and car enthusiasts. Your safety on the road is what matters most.

If you have any questions regarding diagnostics, torque specs, or troubleshooting steps, please leave a comment below or send an email directly. I am always here to provide full guidance and expert support.

Stay safe, maintain your machines properly, and happy driving!

— Rajesh (Rajesh Technical Giyan


Engine Oil: The Blood of Your Motorcycle

The answer is simple. Just like blood keeps the human body alive and healthy, engine oil keeps the motorcycle engine running smoothly, cool, protected, and powerful. Without proper engine oil, even the most expensive motorcycle engine can get damaged within a short time.

Many riders focus only on speed, design, or mileage, but ignore regular oil maintenance. This small mistake later leads to overheating, engine wear, poor mileage, rough sound, and expensive repairs.

In this comprehensive technical guide, you will learn exactly why engine oil is called the blood of your motorcycle, the science behind chemical additives, fluid dynamics under high temperatures, critical signs of degraded oil, and how to decode viscosity ratings (like 10W-40 or 20W-50) to choose the perfect protection for your machine.


Why Engine Oil Is So Important

Inside every motorcycle engine, many metal parts move at extremely high speed and temperature.

Without lubrication, these parts would create heavy friction and damage each other quickly.

Engine oil performs several critical jobs:

  • Reduces friction
  • Prevents overheating
  • Cleans engine components
  • Protects against rust
  • Improves engine life
  • Helps smooth gear shifting
  • Maintains engine performance

That is why engine oil is one of the most important fluids in any motorcycle.


How Engine Oil Protects the Engine

When the motorcycle engine starts, oil circulates through small internal passages and creates a protective layer between moving metal parts.

This oil layer prevents direct metal-to-metal contact.

Without oil protection:

  • Engine temperature rises rapidly
  • Internal parts wear out faster
  • Piston damage may occur
  • Bearings can fail
  • Engine seizure risk increases

A properly lubricated engine runs smoother, quieter, and cooler.


Engine Oil Also Helps Cooling

Many people think only the radiator cools the engine, but engine oil also removes heat from internal engine parts.

As oil flows through the engine, it absorbs heat and helps reduce excessive temperature.

This becomes especially important during:

  • Long-distance highway riding
  • Summer season riding
  • Heavy traffic conditions
  • High-speed riding
  • Mountain climbing roads

Old or dirty oil loses its cooling ability over time.


Cleaning the Engine Internally

Engine oil also works like a cleaning agent inside the motorcycle engine.

During combustion, carbon particles, dust, and tiny metal particles are produced. Oil carries these contaminants toward the oil filter.

Without proper oil circulation:

  • Sludge buildup increases
  • Engine becomes dirty internally
  • Performance drops
  • Fuel economy decreases

That is why both engine oil and oil filters should be replaced regularly.


Signs Your Motorcycle Needs Oil Change

Many riders ignore oil condition until major problems begin.

Here are common signs that your bike needs fresh engine oil:

Warning Signs:

  • Engine feels rough
  • Gear shifting becomes hard
  • Engine overheating
  • Dark black oil color
  • Increased engine noise
  • Poor mileage
  • Burning smell from engine
  • Check engine warning light

Ignoring these signs can shorten engine life.


Choosing the Right Engine Oil

Not every engine oil is suitable for every motorcycle.

Using the wrong oil grade can reduce engine performance and damage internal components.

Important Factors While Choosing Oil:

  • Manufacturer recommendation
  • Engine type
  • Climate condition
  • Riding style
  • Synthetic or mineral oil

Always check the motorcycle owner’s manual before selecting engine oil.


Types of Motorcycle Engine Oil

1. Mineral Oil

This is basic engine oil commonly used in older motorcycles.

Advantages:

  • Affordable price
  • Good for low-performance engines

Disadvantages:

  • Shorter lifespan
  • Less heat resistance

2. Semi-Synthetic Oil

This oil is a mix of mineral and synthetic oil.

Benefits:

  • Better protection
  • Improved performance
  • Reasonable cost

Many daily commuter motorcycles use semi-synthetic oil successfully.


3. Fully Synthetic Oil

Fully synthetic oil provides the highest level of engine protection.

Advantages:

  • Better heat resistance
  • Longer oil life
  • Improved engine smoothness
  • Better high-speed performance

This oil is often recommended for sports bikes and premium motorcycles.


Importance of Regular Oil Changes

Some riders delay oil changes to save money, but this mistake often causes expensive engine repairs later.

Fresh oil helps:

  • Increase engine lifespan
  • Improve fuel efficiency
  • Reduce engine wear
  • Maintain smooth performance
  • Prevent overheating

Regular maintenance is always cheaper than engine rebuilding.


How Often Should You Change Engine Oil?

Oil change intervals depend on:

  • Motorcycle model
  • Oil quality
  • Riding conditions
  • Traffic conditions
  • Weather

Many motorcycles require oil changes between 2,500 to 5,000 kilometers, while premium synthetic oils may last longer.

Always follow the manufacturer’s service schedule.


Common Mistakes Riders Make

1. Ignoring Oil Level

Low oil level can destroy the engine quickly.

2. Using Cheap Oil

Poor-quality oil may fail under high temperature.

3. Mixing Different Oils

Different oil types may not work properly together.

4. Delaying Oil Filter Replacement

Dirty filters reduce oil flow and engine protection.

5. Overfilling Engine Oil

Too much oil can also damage engine components.


Engine Oil and Motorcycle Mileage

Good-quality oil reduces friction and helps the engine run efficiently.

This may improve:

  • Fuel economy
  • Engine response
  • Acceleration smoothness

Dirty oil forces the engine to work harder and consume more fuel.


Best Habits for Long Engine Life

Professional mechanics recommend:

  • Check oil level weekly
  • Warm up engine before riding hard
  • Use recommended oil only
  • Replace oil filter regularly
  • Avoid extreme overheating
  • Follow service intervals properly

Small habits can save thousands of dollars in future repairs Read also tata-sierra-diesel-engine-starting-problem-troubleshooting


Final Thoughts

Engine oil truly is the blood of your motorcycle. Without proper lubrication and maintenance, even the most powerful engine can fail early.

A healthy engine always depends on clean, high-quality engine oil. Whether you ride a commuter bike, cruiser, touring motorcycle, or sports bike, regular oil maintenance is essential for performance, safety, and long engine life.

Always remember: Changing engine oil on time is not an expense — it is an investment in your motorcycle’s future.

Hello friends! If you liked this technical guide, please be sure to share it with your friends. If you have any questions, feel free to leave a comment or send me an email—I’ll be happy to provide full guidance. Thank you!


How to Fix Tata Sierra Diesel Engine Starting Problems


Learn how to diagnose and fix Tata Sierra diesel engine starting problems. Complete step-by-step troubleshooting guide by Rajesh Technical Giyan with expert repair tips.

If your Tata Sierra Diesel refuses to start, takes a long time to crank, starts only after several attempts, or suddenly stops starting altogether, don’t panic. Most diesel engine starting issues are caused by a limited number of components, and with the correct troubleshooting process, the fault can be identified quickly.

In this complete guide, I’ll explain every major reason behind Tata Sierra diesel starting problems, the symptoms to watch for, diagnostic methods, and professional repair solutions that I personally follow in my workshop.


Understanding the Diesel Starting System

Unlike petrol engines, diesel engines ignite fuel using high compression instead of spark plugs. Therefore, several components must work perfectly together:

  • Battery
  • Starter Motor
  • Glow Plug System
  • Fuel Pump
  • Fuel Filter
  • Diesel Injectors
  • High Pressure Fuel Rail
  • Crankshaft Position Sensor
  • Camshaft Position Sensor
  • ECU
  • Immobilizer System

Failure of any one of these can prevent the engine from starting.


Common Symptoms of Tata Sierra Diesel Starting Problems

You may notice one or more of the following:

  • Engine cranks but does not start
  • No crank at all
  • Slow cranking
  • Long self before starting
  • White smoke during cranking
  • Black smoke while starting
  • Engine starts and immediately stalls
  • Starting only when engine is cold
  • Hard starting after parking overnight
  • Check Engine Light ON

Each symptom points toward a different mechanical or electrical fault.


1. Weak Battery

The battery is the first thing to inspect.

Symptoms

  • Slow starter speed
  • Dashboard lights become dim
  • Clicking sound
  • Starter struggles

Diagnosis

  • Measure battery voltage.
  • A healthy battery should show approximately 12.6V when fully charged.
  • While cranking, voltage should not drop excessively.

Solution

  • Recharge the battery.
  • Clean battery terminals.
  • Tighten loose connections.
  • Replace an old or weak battery.

2. Faulty Starter Motor

Even with a healthy battery, a worn starter motor cannot rotate the diesel engine fast enough.

Symptoms

  • Clicking sound
  • Slow cranking
  • Burning smell
  • Starter spins without engaging

Causes

  • Worn carbon brushes
  • Damaged solenoid
  • Armature failure
  • Bearing wear

Repair

Replace damaged internal parts or install a new starter motor if necessary.


3. Glow Plug Failure

Glow plugs are essential for cold starts.

Symptoms

  • Difficult morning start
  • White smoke
  • Rough idle after starting
  • Multiple self attempts

Diagnosis

Test each glow plug with a multimeter.

Solution

Replace faulty glow plugs as a complete set for consistent performance.


4. Dirty Fuel Filter

A clogged fuel filter restricts diesel flow.

Symptoms

  • Long cranking
  • Engine hesitation
  • Loss of power
  • Hard starting

Causes

  • Dirty diesel
  • Water contamination
  • Missed maintenance

Solution

Replace the fuel filter according to the recommended service schedule.


5. Air in the Fuel Line

Air entering the diesel system prevents proper fuel pressure.

Symptoms

  • Engine cranks without starting
  • Starts after repeated attempts
  • Rough idle

Causes

  • Loose fuel pipes
  • Fuel filter replacement
  • Leaking fuel hose

Repair

Prime the fuel system and remove trapped air.


6. Fuel Pump Problems

The fuel pump supplies diesel at the correct pressure.

Symptoms

  • No start
  • Low fuel pressure
  • Engine stalls
  • Poor acceleration

Diagnosis

Check fuel pressure using appropriate diagnostic equipment.

Solution

Repair or replace the faulty pump.


7. Faulty Diesel Injectors

Injectors spray diesel into the combustion chamber.

Symptoms

  • Hard starting
  • White smoke
  • Rough idle
  • Knocking noise

Diagnosis

Perform injector leak-off and balance tests.

Repair

Clean, calibrate, or replace faulty injectors.


8. Crankshaft Position Sensor Failure

Without crankshaft speed information, the ECU cannot inject fuel correctly.

Symptoms

  • Engine cranks but doesn’t start
  • Sudden engine shutdown
  • No RPM signal

Solution

Scan the ECU for fault codes and replace the defective sensor if required.


9. Camshaft Position Sensor Problems

The camshaft sensor synchronizes fuel injection timing.

Symptoms

  • Long cranking
  • Check Engine Light
  • Intermittent starting

Repair

Replace the faulty sensor after proper diagnosis.


10. Immobilizer System Issues

Modern Tata Sierra models include an immobilizer for security.

Symptoms

  • Engine cranks but won’t start
  • Immobilizer warning light
  • Key not recognized

Solution

  • Try the spare key.
  • Check the key battery (if applicable).
  • Reprogram the key if necessary.

11. Low Compression

Diesel engines rely heavily on compression.

Causes

  • Worn piston rings
  • Cylinder wear
  • Valve leakage
  • Head gasket damage

Symptoms

  • Very difficult starting
  • White smoke
  • Low engine power

Diagnosis

Perform a compression test.


12. ECU or Wiring Problems

Electrical faults can interrupt communication between sensors and the ECU.

Symptoms

  • Random starting issues
  • Multiple fault codes
  • Intermittent engine operation

Repair

Inspect:

  • Wiring harness
  • ECU connectors
  • Ground points
  • Relays
  • Fuses

Professional Diagnostic Procedure

In my workshop, I generally follow this sequence:

  1. Check battery voltage.
  2. Inspect battery terminals.
  3. Scan ECU for fault codes.
  4. Test glow plugs.
  5. Check starter motor operation.
  6. Inspect fuel filter.
  7. Measure fuel pressure.
  8. Test injectors.
  9. Check crankshaft and camshaft sensors.
  10. Perform compression test if required.

This systematic approach saves both time and unnecessary replacement costs.


Preventive Maintenance Tips

To reduce starting problems:

  • Use clean, high-quality diesel fuel.
  • Replace the fuel filter on schedule.
  • Service injectors periodically.
  • Keep the battery fully charged.
  • Clean battery terminals regularly.
  • Replace glow plugs when worn.
  • Inspect wiring during every major service.
  • Avoid driving with very low fuel levels.
  • Follow Tata’s recommended maintenance intervals.

Regular preventive maintenance significantly improves reliability and extends engine life.


Workshop Safety Tips

When diagnosing starting issues:

  • Disconnect the battery before electrical repairs.
  • Never smoke near diesel fuel.
  • Wear safety gloves and protective eyewear.
  • Use proper diagnostic tools.
  • Depressurize the fuel system before disconnecting fuel lines.
  • Dispose of used fuel filters responsibly.

Safety should always come first in any repair job.


Frequently Asked Questions (FAQs)

Why does my Tata Sierra diesel crank but not start?

Common reasons include a weak battery, faulty glow plugs, clogged fuel filter, low fuel pressure, injector issues, or sensor failures.

Can a bad fuel filter cause hard starting?

Yes. A blocked fuel filter restricts diesel flow and makes starting difficult.

How long do glow plugs usually last?

Typically between 80,000–100,000 km, depending on driving conditions and maintenance.

Is it safe to keep cranking the engine repeatedly?

No. Excessive cranking can overheat the starter motor and drain the battery.

Should I replace all glow plugs together?

Yes. Replacing the full set ensures balanced performance and reliable cold startRead also hero-glamour-gear-setting-adjustment-guide


Conclusion

The Tata Sierra Diesel Engine Starting Problem can usually be traced to the battery, starter motor, glow plug system, fuel delivery, injectors, sensors, or engine compression. By following a structured troubleshooting process, most faults can be diagnosed accurately without replacing unnecessary parts.

From my experience at Rajesh Technical Giyan, proper diagnosis is always more valuable than guesswork. Regular maintenance, timely replacement of worn components, and the use of quality parts will keep your Tata Sierra diesel engine starting smoothly and performing reliably for years to come.

Hero Glamour Bike Engine Gear Setting: Step-by-Step Adjustment Guide

The Hero Glamour 125 is a popular commuter motorcycle known for its practical performance, comfortable riding experience, and fuel-efficient engine. Like any motorcycle, however, the gear shifting system can develop problems over time. Riders may experience hard gear shifting, difficulty finding neutral, false neutral, a loose or stiff gear lever, gear slipping, or unusual noise during gear changes.

The good news is that every gear-shifting problem does not necessarily mean that the gearbox has to be opened. In many cases, the problem can be related to clutch adjustment, gear pedal position, engine oil condition, drive-chain tension, or the external gear-shift mechanism.

In this guide, we will explain how to inspect and adjust the Hero Glamour gear-shifting system step by step. We will also discuss common symptoms, maintenance procedures, possible causes of gear problems, and important precautions that can help keep the motorcycle’s transmission operating smoothly.

Important: Exact adjustment specifications can vary by Hero Glamour model year and version. Always confirm the specification in the motorcycle’s owner’s manual or service information before making a final adjustment.


Understanding the Hero Glamour Gear Shift System

Before adjusting the gear system, it is useful to understand how the mechanism works.

The Hero Glamour uses a sequential constant-mesh transmission. When the rider operates the gear pedal, the movement is transferred through the gear-shift shaft and selector mechanism to the shift drum. The shift drum controls the movement of the shift forks, which position the transmission components for the selected gear.

The clutch also plays an important role. When the clutch lever is operated, engine power is temporarily disconnected from the transmission, allowing the gears to change more smoothly.

If the clutch is not releasing correctly, the gear pedal or shift mechanism is damaged, the engine oil is unsuitable or badly degraded, or the chain is incorrectly adjusted, gear shifting can become difficult.


Main Components of the Gear-Shifting System

The external and internal parts involved in gear shifting include:

  • Gear shift pedal
  • Gear-shift shaft
  • Selector mechanism
  • Shift drum
  • Shift forks
  • Transmission gears
  • Clutch assembly
  • Drive chain
  • Engine oil
  • Return mechanism and springs

All these components must operate correctly for smooth gear changes.


Common Signs of a Gear-Shifting Problem

Before making an adjustment, identify the symptoms carefully.

1. Hard Gear Shifting

The gear lever requires excessive force or feels unusually stiff when changing gears.

2. Difficulty Finding Neutral

Neutral becomes difficult to select, especially when the motorcycle is stopped and the engine is running.

3. False Neutral

The transmission appears to enter a position between two gears, causing the engine to rev without normal power being delivered to the rear wheel.

4. Gear Slipping or Jumping Out

If the motorcycle unexpectedly comes out of gear during acceleration, there may be a problem inside the transmission. This should not be ignored.

5. Unusual Gearbox Noise

Grinding, knocking, or abnormal mechanical noise during gear changes may indicate a clutch, transmission, or selector-related problem.

6. Loose or Stiff Gear Pedal

A gear pedal that has excessive play, does not return properly, or feels unusually tight should be inspected.


Tools Required

Prepare the following basic tools before starting the inspection:

  • Suitable spanners
  • Screwdriver set
  • Pliers
  • Allen keys if required
  • Clean cloth
  • Suitable chain lubricant
  • Correct motorcycle engine oil
  • Torque wrench, if available
  • Motorcycle service manual for model-specific specifications

Use clean and properly sized tools to prevent damage to bolts and fasteners.


Step-by-Step Hero Glamour Gear Setting and Inspection

Step 1 – Park the Motorcycle Safely

Park the motorcycle on a level surface.

Use the center stand where available and make sure the motorcycle is stable before beginning work.

Switch off the engine and allow hot components to cool before working around the engine and transmission.

Do not work underneath an unstable motorcycle.


Step 2 – Check the Clutch Lever Free Play

The clutch is one of the first things to inspect when gear shifting becomes difficult.

Operate the clutch lever several times and check its free play.

For many Hero motorcycles, clutch lever free play is commonly around 10–15 mm, but the exact specification should be confirmed for your particular Glamour model.

If the cable is adjusted too tightly, the clutch may remain partially disengaged and can slip.

If there is excessive free play, the clutch may not disengage completely, which can make gear shifting and neutral selection difficult.

How to Adjust

Use the clutch cable adjuster provided on the motorcycle.

Make small adjustments and repeatedly check the lever operation.

After adjustment, operate the clutch several times and confirm that the clutch engages and disengages smoothly.


Step 3 – Inspect the Gear Shift Pedal

Next, inspect the gear pedal.

The pedal should be positioned comfortably for the rider’s foot and should not touch the engine cover, footrest, or other components during operation.

If the pedal position is incorrect:

  1. Locate the gear lever mounting or pinch bolt.
  2. Loosen it using the correct tool.
  3. Remove or reposition the lever as required.
  4. Set the pedal to a comfortable position.
  5. Reinstall it correctly.
  6. Tighten the fastener securely according to the manufacturer’s specification.

Do not force the lever onto the shaft or strike it with a hammer.


Step 4 – Check Gear Pedal Movement

Move the gear pedal up and down by hand.

It should move smoothly and return correctly after operation.

If the pedal feels stiff:

  • Inspect the pivot area.
  • Remove dirt and mud.
  • Check for rust.
  • Inspect for excessive play.
  • Lubricate the appropriate pivot point.
  • Check the return mechanism.

If the shaft or return mechanism is damaged, professional repair may be necessary.


Step 5 – Check the Engine Oil

Engine oil is extremely important for motorcycles with a wet clutch and integrated transmission.

The same oil can lubricate several important components, including:

  • Engine components
  • Clutch assembly
  • Transmission gears
  • Bearings
  • Internal shifting components

Old, contaminated, incorrect, or unsuitable oil can contribute to poor clutch operation and difficult gear shifting.

Check the oil level according to the procedure specified for your motorcycle.

Also inspect the oil for signs of contamination, unusual smell, or excessive degradation.

Use motorcycle engine oil that meets the manufacturer’s recommended viscosity and specification. If your particular model specifies 10W-30 and JASO MA/MA2, use oil meeting that requirement.

Do not select engine oil simply because it is suitable for a car; motorcycle wet-clutch requirements can be different.


Step 6 – Inspect the Drive Chain

The drive chain does not directly adjust the gearbox, but incorrect chain tension can affect power delivery, riding smoothness, and overall drivetrain operation.

Check the chain slack according to the motorcycle’s owner’s manual.

Do not assume one measurement applies to every Glamour model or every riding condition.

If the Chain Is Too Tight

An excessively tight chain can increase stress on:

  • Chain and sprockets
  • Wheel bearings
  • Transmission output components

If the Chain Is Too Loose

A loose chain can cause:

  • Jerky acceleration
  • Chain noise
  • Excessive movement
  • Poor power delivery

Adjust the chain evenly on both sides and make sure the rear wheel remains properly aligned.

After adjustment, lubricate the chain with suitable chain lubricant.


Step 7 – Inspect the Gear-Shift Mechanism

Check the external gear-shift mechanism carefully.

Look for:

  • Loose bolts
  • Excessive play
  • Bent components
  • Damaged splines
  • Rust
  • Dirt accumulation
  • Stiff movement

The gear-shift shaft should operate smoothly.

If the mechanism has excessive play or does not return properly, simply adjusting the clutch cable may not solve the problem.


Step 8 – Check the Clutch Operation

Pull the clutch lever and observe how the motorcycle behaves while selecting first gear.

With the clutch fully pulled in, the motorcycle should not try to move forward significantly.

If the motorcycle wants to creep forward strongly, the clutch may not be disengaging completely.

Possible causes include:

  • Incorrect clutch cable adjustment
  • Damaged clutch cable
  • Clutch plate problems
  • Incorrect clutch adjustment
  • Internal clutch wear

If external adjustment does not correct the problem, the clutch assembly should be inspected.


Step 9 – Test All Gears

After completing the external inspections and adjustments, test the gear system carefully.

With the motorcycle in a safe area, check:

  • First gear
  • Second gear
  • Third gear
  • Fourth gear
  • Fifth gear, if equipped

Each gear should engage positively without excessive force or abnormal grinding.

Pay particular attention to neutral selection and the transition between lower gears.

Never test a repaired motorcycle at high speed immediately.

Start slowly and make sure the braking, clutch, throttle, and transmission systems are operating correctly.


Why Proper Gear Adjustment Is Important

Correct adjustment and regular maintenance can provide several benefits.

Smooth Gear Shifting

A correctly adjusted clutch and properly maintained shift mechanism allow easier gear changes.

Better Riding Comfort

Smooth transmission operation is especially useful during frequent city riding and stop-and-go traffic.

Reduced Clutch Wear

Correct clutch free play helps prevent unnecessary clutch slipping.

Better Power Delivery

A correctly maintained drivetrain transfers engine power more effectively to the rear wheel.

Longer Component Life

Regular inspection can help identify worn cables, chains, pedals, and other components before they cause additional problems.


Common Causes of Hero Glamour Gear Problems

Before assuming that the gearbox is damaged, inspect the simpler causes first.

Common causes include:

  • Incorrect clutch adjustment
  • Worn clutch cable
  • Old or unsuitable engine oil
  • Incorrect chain tension
  • Loose gear pedal
  • Damaged gear-shift mechanism
  • Bent gear lever
  • Dry or contaminated pivot
  • Worn clutch components
  • Internal transmission wear

If the motorcycle continues to jump out of gear, produces serious internal noise, or repeatedly enters false neutral after external adjustments, the transmission should be inspected by a qualified mechanic.


Common Mistakes to Avoid

Avoid the following mistakes when working on the gear-shifting system:

Do Not Over-Tighten the Clutch Cable

The clutch needs correct free play. Excessive tightening can cause clutch slipping.

Do Not Ignore the Engine Oil

Delayed oil changes can affect engine, clutch, and transmission operation.

Do Not Use Unsuitable Oil

Always follow the manufacturer’s recommended motorcycle oil specification.

Do Not Ride With an Incorrectly Adjusted Chain

Both excessive chain slack and excessive tightness can cause drivetrain problems.

Do Not Force the Gear Lever

If a gear does not engage normally, do not use excessive force.

Do Not Ignore Gearbox Noise

Persistent grinding, knocking, or gear jumping requires further inspection.


Preventive Maintenance Tips

Regular maintenance can prevent many shifting problems.

  • Check clutch free play during routine service.
  • Inspect the gear pedal regularly.
  • Keep the shift mechanism clean.
  • Lubricate appropriate moving points.
  • Maintain correct drive-chain slack.
  • Lubricate the chain at suitable intervals.
  • Replace engine oil according to the manufacturer’s service schedule.
  • Inspect the clutch cable for damage or stiffness.
  • Check the chain and sprockets for wear.
  • Repair unusual transmission symptoms early.

Instead of waiting for a major problem, regular inspection is a much better way to protect the motorcycle.


When Should You Open the Gearbox?

External adjustment should always be checked first when the symptoms suggest a simple adjustment problem.

However, gearbox inspection may be necessary if:

  • The motorcycle repeatedly jumps out of gear.
  • False neutral continues after proper adjustment.
  • There is severe internal transmission noise.
  • A gear cannot be selected.
  • The gear pedal does not operate the selector correctly.
  • Internal selector components may be damaged.
  • The motorcycle has suffered previous transmission damage.

Internal gearbox work requires proper tools, technical knowledge, and model-specific service information.

Do not open the engine unnecessarily if the problem can be solved through external inspection and adjustment.


Frequently Asked Questions

Why is my Hero Glamour difficult to shift into neutral?

Difficulty finding neutral can be related to clutch adjustment, engine oil condition, chain/drivetrain condition, or the shifting mechanism. Check the clutch adjustment and other external factors first.

What is the correct clutch free play?

A commonly used range is around 10–15 mm, but always confirm the exact specification for your particular Hero Glamour model and year.

Can engine oil affect gear shifting?

Yes. Oil condition and specification can influence clutch and transmission operation, especially on motorcycles using a wet clutch.

Why does my motorcycle jump out of gear?

Possible causes include incorrect shifting, worn transmission components, damaged gear dogs, selector problems, or other internal gearbox issues. Persistent gear jumping should be inspected by a qualified mechanic.

Why is my gear pedal stiff?

A stiff pedal can result from dirt, rust, a dry pivot, damaged external components, or an internal selector problem. Inspect the external mechanism before assuming gearbox damage.

How often should the gear pedal be lubricated?

Inspect it during routine servicing and lubricate the appropriate pivot when necessary, especially after riding through rain, mud, or dusty conditions. Follow the manufacturer’s maintenance recommendations.Read also repairing-bike-brakes-step-by-step-drum-disc-guide


Conclusion

A properly maintained gear-shifting system is essential for smooth, comfortable, and safe motorcycle operation. Hard shifting, difficulty finding neutral, false neutral, a stiff gear pedal, and unusual transmission behavior should not be ignored.

In many cases, the solution may be as simple as correcting clutch free play, checking the gear pedal position, inspecting the shift mechanism, maintaining correct chain tension, or replacing old engine oil with the correct motorcycle specification.

However, if the motorcycle continues to jump out of gear, produces serious internal noise, or shows persistent transmission problems after external adjustments, the gearbox and selector components should be inspected properly.

By following a regular maintenance routine and addressing small problems early, you can help maintain smooth gear changes and extend the working life of your Hero Glamour’s clutch and transmission system.

I hope this guide from Rajesh Technical Giyan helps you understand the Hero Glamour gear-shifting system and perform basic inspection and adjustment safely.

For more motorcycle repair guides, engine maintenance tutorials, troubleshooting articles, and practical automotive information, keep visiting Rajesh Technical Giyan.
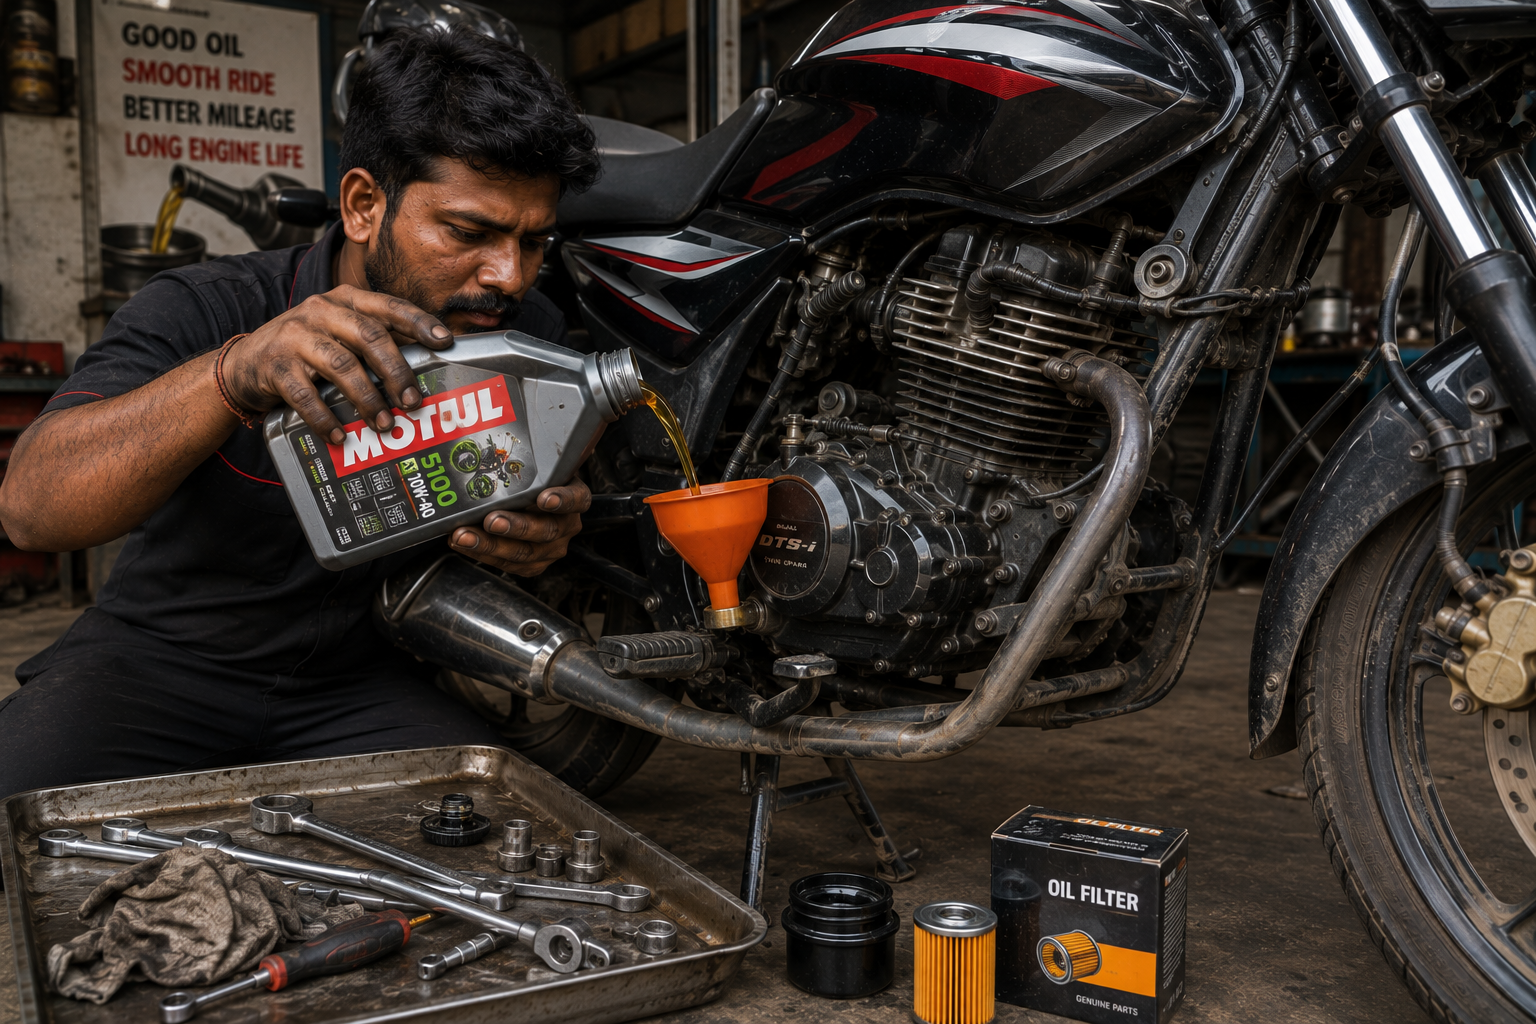
Ride safely, maintain your motorcycle regularly, and keep your machine in good working condition.

Repairing Bike Brakes Step By Step  Drum & Disc Brake Repair Guide

Bike brakes are one of the most important safety systems in any motorcycle. No matter how powerful the engine is or how expensive the bike looks, weak brakes can make riding extremely dangerous. A ⅞quickly become a major accident if ignored for too long. Many riders continue using motorcycles even after noticing brake noise, weak braking power, vibration, or loose brake levers. This is a very risky habit because brake failure can happen suddenly, especially during emergency stopping situations.

The good news is that basic bike brake repair and maintenance is not very difficult. With the correct tools, proper safety precautions, and step-by-step guidance, beginners can understand how motorcycle braking systems work and how to repair common brake problems safely.

In this complete guide, you will learn:

How drum brakes work

How disc brakes work

Step-by-step brake repair process

Common brake problems

Safety precautions

Maintenance tips for long brake life

In this advanced technical breakdown, we will explore hydraulic fluid master cylinders, brake pad friction coefficients, drum brake cam engagements, and precise brake bleeding procedures to eliminate air pockets and ensure your motorcycle delivers maximum stopping power when it matters most.


Why Brake Maintenance Is Important

Brake maintenance is not only about stopping the bike. It is directly connected to rider safety, road control, and riding confidence.

A properly maintained braking system helps:

  • Reduce stopping distance
  • Improve emergency braking performance
  • Prevent skidding
  • Increase rider confidence
  • Protect expensive components
  • Improve overall bike safety

Ignoring brake maintenance can create serious issues such as:

  • Brake failure
  • Rotor damage
  • Brake shoe wear
  • Loss of control during rain
  • Tire skidding
  • Accidents at high speed

Many riders spend money on engine performance upgrades but ignore brake servicing. However, good brakes are more important than high speed because safety should always come first.


Understanding How Motorcycle Brakes Work

Before starting repairs, it is important to understand the basic working principle of bike brakes.

Motorcycle brakes work by creating friction between moving parts.

Drum Brake Working Principle

In a drum brake system:

  • Brake shoes press against the inner drum surface
  • Friction slows down wheel rotation
  • The bike gradually stops

Drum brakes are simple, durable, and commonly used in rear wheels.

Disc Brake Working Principle

In disc brakes:

  • Brake pads press against the rotating disc rotor
  • Hydraulic pressure creates braking force
  • The wheel slows down quickly

Disc brakes provide:

  • Better stopping power
  • Faster response
  • Improved high-speed safety
  • Better heat control

This is why most modern motorcycles use front disc brakes.


Types of Bike Brakes

Most motorcycles use two main braking systems.

1. Drum Brakes

Drum brakes are commonly found in:

  • Rear wheels
  • Small commuter motorcycles
  • Budget bikes

Advantages:

  • Low maintenance cost
  • Long-lasting parts
  • Simple repair process

Disadvantages:

  • Less stopping power
  • Heat buildup during long rides
  • Reduced performance in rain

2. Disc Brakes

Disc brakes are mostly used in:

  • Front wheels
  • Sports bikes
  • Modern motorcycles

Advantages:

  • Strong braking performance
  • Better heat dissipation
  • Quick response
  • Improved emergency braking

Disadvantages:

  • Slightly expensive maintenance
  • Brake pads wear faster

Many motorcycles now use:

  • Front disc brake
  • Rear drum brake

This combination balances performance and affordability.


Tools Required for Brake Repair

Before starting any brake repair work, prepare the proper tools.

Essential Tools

  • Spanner set
  • Ring spanner
  • Screwdriver set
  • Brake cleaner spray
  • Cleaning cloth
  • Pliers
  • C-clamp
  • Lubricant spray
  • New brake pads or brake shoes

Safety Equipment

  • Hand gloves
  • Safety glasses
  • Clean working area

Using the correct tools helps prevent damage to brake components.


How To Repair Drum Brake (Step By Step)

Step 1 – Place the Bike Safely

Park the motorcycle on the center stand.

Make sure:

  • The bike is stable
  • The surface is flat
  • The rear wheel rotates freely

Safety is very important while repairing brakes.


Step 2 – Remove the Rear Wheel

  • Loosen the axle nut carefully
  • Disconnect the brake cable
  • Remove chain adjustment if required
  • Slide out the rear wheel slowly

Keep all washers and nuts safely because missing spacers can create alignment problems later.


Step 3 – Open the Drum Brake Assembly

Remove the drum plate carefully.

Now inspect:

  • Brake shoes
  • Springs
  • Brake cam
  • Dust buildup

If brake shoes are thin or cracked, replace them immediately.


Step 4 – Clean the Drum Brake Properly

Brake dust reduces braking performance.

Use:

  • Brake cleaner spray
  • Dry cloth
  • Soft brush

Never use oily grease inside drum brakes because it reduces friction and weakens braking power.


Step 5 – Check Brake Cam Movement

Rotate the brake cam manually.

If movement feels tight:

  • Clean rust carefully
  • Apply light lubricant externally only

A jammed brake cam can cause:

  • Hard brake lever
  • Weak braking
  • Uneven brake performance

Step 6 – Install New Brake Shoes

  • Fit the brake shoes correctly
  • Install springs carefully
  • Ensure proper alignment

Improper installation may create:

  • Brake noise
  • Wheel locking
  • Uneven braking

Step 7 – Reassemble the Wheel

  • Install the drum plate
  • Refit the wheel
  • Tighten axle nut properly
  • Connect brake cable

After assembly:

  • Rotate wheel manually
  • Check brake free play

How To Repair Disc Brake (Step By Step)

Step 1 – Inspect the Disc Rotor

Before opening anything:

  • Check rotor condition
  • Look for deep scratches
  • Inspect bending or warping

A damaged rotor can cause vibration during braking.


Step 2 – Remove the Brake Caliper

Use the correct spanner to remove caliper bolts.

Carefully remove the caliper without damaging:

  • Brake hose
  • Hydraulic line
  • Brake sensor wire

Never hang the caliper by the brake hose.


Step 3 – Remove Old Brake Pads

  • Remove retaining pin
  • Take out old brake pads
  • Inspect pad wear condition

Uneven pad wear may indicate:

  • Stuck piston
  • Caliper alignment issue

Step 4 – Clean the Caliper

Dust and dirt collect around the piston area.

Use:

  • Brake cleaner spray
  • Soft cloth
  • Air pressure if available

Cleaning improves piston movement and braking efficiency.


Step 5 – Push Back the Piston

Use a C-clamp carefully.

Push the piston slowly back into position to create space for new brake pads.

Do not force the piston aggressively because:

  • Seals may get damaged
  • Brake fluid leakage can occur

Step 6 – Install New Brake Pads

  • Insert new brake pads
  • Secure retaining pin
  • Refit caliper correctly
  • Tighten bolts carefully

Always use genuine or high-quality brake pads for better safety.


Step 7 – Test the Brake Lever

Press the brake lever multiple times.

This helps:

  • Build hydraulic pressure
  • Adjust piston position
  • Seat the new brake pads properly

Never ride immediately without testing brake pressure.


Common Signs Your Bike Brakes Need Repair

Many motorcycles show warning signs before brake failure.

Watch for these symptoms:

1. Squeaking Noise

Brake pads or shoes may be worn out.

2. Grinding Sound

Metal-to-metal contact may damage the rotor or drum.

3. Soft Brake Lever

Air inside brake line or fluid leakage may be present.

4. Brake Vibration

Warped disc rotor or uneven brake surface can cause vibration.

5. Bike Pulling to One Side

Uneven brake pressure may exist.

6. Longer Stopping Distance

Brake performance has reduced and requires immediate inspection.

Ignoring these signs can become dangerous.


Common Brake Problems and Solutions

ProblemPossible CauseSolutionWeak brakingWorn brake padsReplace padsBrake noiseDust buildupClean componentsHard brake leverJammed mechanismLubricate moving partsBrake vibrationBent rotorReplace or repair rotorRear wheel lockingTight adjustmentAdjust free play


Important Safety Tips During Brake Repair

Always follow proper safety rules.

  • Never touch hot brake components
  • Use proper tools only
  • Tighten bolts correctly
  • Avoid oil contamination
  • Test brakes at low speed first
  • Wear gloves during repair

Brakes are directly related to rider life and safety.


Common Mistakes Beginners Make

Many beginners damage brake systems because of simple mistakes.

Mistake 1 – Over Tightening Bolts

This can damage threads and brake parts.

Mistake 2 – Touching Brake Pads With Oily Hands

Oil reduces braking efficiency.

Mistake 3 – Ignoring Brake Fluid

Low brake fluid causes weak braking.

Mistake 4 – Improper Pad Installation

Wrong fitting creates uneven braking.

Mistake 5 – Skipping Brake Testing

Always test before normal riding.


Maintenance Tips For Long Brake Life

Proper maintenance saves money and improves safety.

Useful Brake Maintenance Tips

  • Clean brakes regularly
  • Check brake fluid monthly
  • Replace worn pads early
  • Avoid aggressive braking
  • Inspect rotor condition
  • Check cable adjustment
  • Use quality spare parts

Regular inspection prevents expensive repairs later.


When Should You Visit a Professional Mechanic?

Some brake problems require expert attention.

Visit a mechanic if:

  • Brake fluid leaks
  • ABS warning light appears
  • Rotor is severely damaged
  • Brake piston gets stuck
  • Hydraulic system fails

Do not take risks with serious brake problems.read also suzuki-bike-clutch-plate-changing-process


Conclusion

Repairing motorcycle brakes is an important skill for every rider. Whether your bike uses drum brakes or disc brakes, understanding the repair process helps improve safety and riding confidence.

Proper brake maintenance prevents accidents, improves stopping performance, and increases the life of brake components. Small issues like brake noise, weak braking, or vibration should never be ignored because they can become dangerous later.

By following the correct repair steps, using quality parts, and performing regular maintenance, you can keep your motorcycle braking system smooth, reliable, and safe for daily riding.

Always remember: A powerful engine is useless without strong and reliable brakes.

Ride safely, maintain your bike properly, and never ignore brake problems.

Frequently Asked Questions (FAQ)

Q1. How often should motorcycle brakes be checked?

Motorcycle brakes should be inspected every few weeks or before long rides.

Q2. How long do brake pads last?

Brake pad life depends on riding style, road conditions, and brake quality.

Q3. Can beginners repair bike brakes?

Yes, basic brake repair can be done by beginners with proper tools and safety precautions.

Q4. Why do bike brakes make noise?

Brake noise is usually caused by dust, worn pads, or improper fitting.

Q5. Is riding with weak brakes dangerous?

Yes, weak brakes can increase stopping distance and accident risk.

Friends, if you found this technical guide helpful, please feel free to share it with your fellow riders and car enthusiasts. Your safety on the road is what matters most.

If you have any questions regarding diagnostics, torque specs, or troubleshooting steps, please leave a comment below or send an email directly. I am always here to provide full guidance and expert support.

Stay safe, maintain your machines properly, and happy driving!

— Rajesh (Rajesh Technical Giyan

Suzuki Bike Clutch Plate Changing Process Step by Step


The clutch system is one of the most important components of every Suzuki motorcycle. Whether you ride a Suzuki Gixxer, Access 125, Hayate, Intruder, Burgman, GS150R, or any other Suzuki bike, a healthy clutch ensures smooth gear shifting, better acceleration, and comfortable riding.

However, after thousands of kilometers, the clutch friction plates gradually wear out. When this happens, you may notice clutch slippage, poor pickup, hard gear shifting, difficulty finding neutral, or unusual engine RPM without an increase in speed. Ignoring these symptoms can damage other transmission components and lead to expensive repairs.

Fortunately, replacing Suzuki clutch plates is not as difficult as many riders think. With the right tools, proper preparation, and a little patience, you can replace the clutch plates safely at home or in your workshop.

In this detailed guide, you will learn:

  • How the Suzuki wet clutch system works
  • Symptoms of worn clutch plates
  • Tools required
  • Complete step-by-step clutch replacement process
  • Common mistakes to avoid
  • Maintenance tips after installation
  • Frequently Asked Questions

Whether you are a beginner or an experienced mechanic, this guide will help you perform a professional clutch replacement.


Understanding Suzuki Wet Multi-Plate Clutch System

Most Suzuki motorcycles use a wet multi-plate clutch system.

This clutch assembly consists of:

  • Clutch Basket
  • Clutch Hub
  • Friction Plates
  • Steel Plates
  • Pressure Plate
  • Clutch Springs
  • Clutch Release Mechanism

The entire clutch assembly runs inside engine oil. When the clutch lever is pressed, the pressure plate releases the clutch plates, disconnecting engine power from the gearbox. When the lever is released, the springs press the plates together, transferring engine power to the rear wheel.

Over time, the friction material wears down, reducing clutch performance.


Signs That Your Suzuki Clutch Plates Need Replacement

Before replacing the clutch plates, identify the warning signs.

Clutch Slipping

The engine RPM increases rapidly, but the motorcycle speed does not increase accordingly.


Hard Gear Shifting

Gears become difficult to engage, especially first and second gear.


Difficulty Finding Neutral

Neutral becomes difficult to locate while the engine is running.


Poor Acceleration

The motorcycle feels sluggish even after opening the throttle.


Burning Smell

A burnt clutch smell usually indicates overheated friction plates.


Reduced Fuel Economy

A slipping clutch wastes engine power and lowers fuel efficiency.


Tools and Materials Required

Before starting the replacement process, prepare the following tools:

  • Socket wrench set
  • Torque wrench
  • Screwdriver set
  • Allen key set
  • Combination spanners
  • Oil drain pan
  • Brake cleaner
  • Microfiber cloth
  • New clutch friction plates
  • New steel plates (if required)
  • New clutch springs
  • New clutch cover gasket
  • Fresh 10W-40 JASO MA2 engine oil
  • Rubber mallet
  • Plastic scraper

Step-by-Step Suzuki Clutch Plate Changing Process

Step 1 – Warm the Engine

Start the engine and let it idle for about 2–3 minutes.

Warm engine oil drains faster and removes dirt more effectively.

Switch off the engine before beginning work.


Step 2 – Drain the Engine Oil

Place an oil drain pan beneath the engine.

Remove the drain bolt carefully.

Allow all engine oil to drain completely.

Remove the oil filler cap to improve oil flow.


Step 3 – Remove the Clutch Cover

Remove all components blocking access to the clutch cover.

Depending on your Suzuki model, this may include:

  • Footrest bracket
  • Rear brake pedal
  • Clutch cable
  • Side cover

Remove the clutch cover bolts evenly.

Gently tap the cover using a rubber mallet.

Never force it open using a screwdriver.


Step 4 – Inspect the Clutch Assembly

After removing the cover, inspect:

  • Clutch basket
  • Pressure plate
  • Springs
  • Steel plates
  • Friction plates

Check for grooves, cracks, overheating, or excessive wear.


Step 5 – Remove the Clutch Springs

Loosen the spring bolts gradually in a crisscross pattern.

Remove:

  • Spring bolts
  • Spring retainers
  • Clutch springs

Keep all components organized.


Step 6 – Remove Old Clutch Plates

Remove the pressure plate.

Carefully pull out:

  • Friction plate
  • Steel plate
  • Friction plate
  • Steel plate

Maintain the original order for reference.


Step 7 – Clean All Components

Use brake cleaner to remove:

  • Old oil
  • Dirt
  • Metal particles
  • Carbon deposits

Inspect the clutch basket carefully.

Replace it if deep grooves are present.


Step 8 – Soak New Friction Plates

Before installation, soak all new friction plates in fresh engine oil for 30–60 minutes.

This prevents dry friction during the first engine start.


Step 9 – Install New Clutch Plates

Install the clutch plates in the correct sequence:

Friction Plate → Steel Plate → Friction Plate → Steel Plate

Continue until all plates are installed.

Ensure each plate sits correctly inside the clutch basket.


Step 10 – Install Pressure Plate and Springs

Reinstall the pressure plate.

Install new clutch springs.

Hand-tighten the bolts first.

Then tighten evenly using a torque wrench according to Suzuki specifications.


Step 11 – Install New Clutch Cover Gasket

Remove the old gasket completely.

Clean both mating surfaces.

Install a new gasket.

Reinstall the clutch cover carefully.

Tighten the bolts evenly in a crisscross pattern.


Step 12 – Refill Fresh Engine Oil

Install the drain bolt.

Pour the recommended quantity of fresh JASO MA2 motorcycle engine oil.

Check the oil level.


Step 13 – Adjust Clutch Cable

Adjust clutch free play to approximately 2–3 mm.

The clutch lever should move smoothly without excessive looseness.


Step 14 – Test the Motorcycle

Start the engine.

Check for:

  • Oil leaks
  • Gear shifting
  • Clutch engagement
  • Engine noise

Take a short test ride.

Ensure everything operates smoothly.


Post Installation Tips

After replacing the clutch plates:

  • Ride gently for the first 200–300 km
  • Avoid sudden acceleration
  • Avoid racing starts
  • Check engine oil level regularly
  • Reinspect clutch cable adjustment after a few days

Common Mistakes to Avoid

Many riders make these mistakes during clutch replacement:

  • Installing dry clutch plates
  • Mixing the order of steel and friction plates
  • Reusing weak clutch springs
  • Over-tightening spring bolts
  • Using car engine oil instead of motorcycle oil
  • Reusing damaged clutch cover gaskets
  • Ignoring clutch basket wear

Avoiding these mistakes will greatly improve clutch life.


Maintenance Tips

To extend clutch life:

  • Change engine oil on time.
  • Always use JASO MA2 motorcycle engine oil.
  • Avoid half-clutch riding.
  • Do not overload the motorcycle.
  • Inspect clutch cable regularly.
  • Replace worn clutch springs along with clutch plates.

Frequently Asked Questions (FAQ)

How do I know if my Suzuki clutch plates are worn out?

Common symptoms include clutch slipping, poor acceleration, hard gear shifting, difficulty finding neutral, and a burning clutch smell.

Is it necessary to soak new clutch plates in oil?

Yes. Always soak new friction plates in fresh engine oil for 30–60 minutes before installation.

Can I reuse old steel plates?

Yes, if they are perfectly flat and free from discoloration, cracks, or deep scratches.

Should clutch springs also be replaced?

Yes. Installing new springs with new clutch plates provides better clutch performance and prevents slippage.

How long do Suzuki clutch plates last?

Under normal riding conditions, Suzuki clutch plates usually last 25,000 to 40,000 km, depending on riding habits and maintenanceRead also bs6 bikes-electrical-battery-problems


Conclusion

Replacing the clutch plates on your Suzuki motorcycle is one of the most important maintenance jobs for restoring smooth gear shifting, strong acceleration, and reliable power transmission. By following the correct replacement procedure, using genuine or high-quality replacement parts, and tightening every component to the recommended torque, you can complete the repair safely and confidently.

Regular clutch maintenance not only improves riding comfort but also protects expensive gearbox components from unnecessary wear. Timely replacement of worn clutch plates, proper engine oil changes, and correct clutch cable adjustment will significantly increase the lifespan of your Suzuki motorcycle.

We hope this complete guide from Rajesh Technical Giyan helps you perform a professional clutch plate replacement with confidence. If you found this guide useful, share it with fellow Suzuki riders and motorcycle enthusiasts. Ride safely, maintain your motorcycle regularly, and enjoy smooth, reliable performance on every journey. 🏍️🔧

🏍️ Why BS6 Bike Battery Drains Quickly: Full Explanation and Solution

🏍️ Why BS6 Bike Battery Drains Quickly: Full Explanation and Solution

BS6 bikes (Bharat Stage VI emission norm vehicles) have transformed the two-wheeler market with advanced fuel systems and better emission control technology. While they are highly efficient, eco-friendly, and designed for smooth performance, a common issue has been noticed among many riders — rapid battery drainage. Even brand-new or well-maintained BS6 bikes often start showing signs of a weak or dead battery much earlier than expected. Whether it’s due to complex fuel injection systems, continuous sensor monitoring, or frequent short commutes, a weak battery can turn your daily ride into a stressful struggle.

This comprehensive technical guide covers all the major mechanical and electronic reasons behind BS6 bike battery problems and also provides practical, step-by-step solutions to extend your battery’s operational life. In this deep-dive analysis, we will explore Electronic Control Unit (ECU) parasitic draw, alternator charging thresholds, closed-loop sensor power demands, and how to accurately measure battery health using a digital multimeter to prevent sudden breakdowns.


 Reason 2: Automatic Headlamp On (AHO)

By law, all BS6 bikes come with AHO (Automatic Headlamp On). This means the headlight switches on automatically the moment you start the bike.

Continuous headlamp usage increases battery load.

In older BS4 bikes, riders could turn the headlight off, but now that option is gone.

🔧 Solution: Replace conventional bulbs with LED headlamps. LEDs consume less power and reduce stress on the battery.

 Reason 3: Lower Idle RPM

BS6 bikes are programmed with low idle RPM to minimize emissions.

At low idle speeds, the alternator produces less electricity.

As a result, the battery doesn’t charge properly in stop-and-go traffic or when used for short trips.

 Example: Daily 2–3 km commutes are not enough to recharge the battery.

 Reason 4: Cold Starts and ECU Load

During cold weather or rainy seasons:

Sensors take longer to stabilize.

The ECU consumes extra power to balance the fuel-air ratio.

👉 This puts additional stress on the battery, especially if it’s already weak.

 Tip: Warm up your bike for 2–3 minutes before riding. Avoid hard acceleration during a cold start.

 Reason 5: Smaller Battery Capacity

Most commuter BS6 bikes come with 3Ah or 4Ah batteries, which are only just enough to power the bike’s essential electronics.

With FI, AHO, ECU, and sensors, such small batteries drain faster.

If you add extra accessories like a USB charger, GPS tracker, or loud horn, the problem gets worse.

 Solution: Upgrade to a higher-capacity battery (5Ah or 6Ah) after confirming with your service center.

 Reason 6: Faulty Rectifier / Regulator or Weak Alternator

If your bike’s rectifier or voltage regulator is faulty:

The battery may not charge properly while riding.

In some cases, it may even overcharge and get damaged.


 Warning Signs:

Headlight brightness keeps fluctuating.

Sudden failure of the self-start.

Battery overheating.

 Reason 7: Loose Terminals or Poor Grounding

Sometimes the problem lies in the wiring, not the battery.

Loose terminals

Rusted connectors

Faulty grounding

These cause current leakage, leading to overnight battery drainage.

 What to Do: Remove the battery cover, clean the terminals with sandpaper, tighten all nuts, and apply petroleum jelly to prevent rust.

 Reason 8: Frequent Use of Self-Start and Ignition ON

If you:

Use self-start frequently instead of kick-start (where available), or

Keep the ignition in ON mode while the engine is off

Then you are wasting battery power unnecessarily.

 Practice: Use the kick-starter occasionally, especially when the battery feels weak. Never leave the ignition ON while waiting.

 Reason 9: Poor-Quality or Old Battery

Not all manufacturers provide high-quality batteries in BS6 bikes.

Cheap or unbranded batteries have lower charge retention.

After 2–3 years of use, even good batteries start draining faster


Check: If your battery is older than 24 months, replace it with a reliable brand like Exide, Amaron, or SF Sonic.

 Practical Tips to Prevent Battery Drain in BS6 Bikes

Tip Description

🔄 Ride Regularly

Take 10–15 km rides every 2–3 days

🔌 Use LED Bulbs

Reduces electrical load

🔒 Kill-Switch Usage

Don’t leave ignition ON unnecessarily

🔧 Regular Servicing

Check charging system, terminals, and battery water level

🏍 Kick-Start Often

Especially in cold conditions or low charge situations

📵 Limit Accessories

Avoid overloading the system with gadgets

When to Visit a Mechanic?

You should get your battery checked if:

Self-start doesn’t work even after long rides

Battery drains within a day or two

Indicators or headlights flicker frequently

Horn becomes weak

👉 A mechanic can perform a battery load test and charging system inspection to identify the exact faultRead also tvs-bike-clutch-center-starting-issue


 Conclusion

BS6 bikes are designed for cleaner emissions and better efficiency, but they require smarter battery management.

👉 If your BS6 bike battery drains quickly, don’t ignore it. Check your riding habits, the age of your battery, and the overall electrical health of your bike.

👉 By following simple tips like riding regularly, limiting accessories, and maintaining the charging system, you can extend the life of your battery and enjoy smooth rides.

A draining battery is not a sign that your BS6 bike is bad — it’s simply a result of modern features that demand more power. By following the right maintenance tips, checking the charging system, and using your bike regularly, you can keep your battery healthy for years. Remember, prevention is always better than cure. Treat your BS6 bike’s battery with care, and it will never let you down.

Friends, if you found this technical guide helpful, please feel free to share it with your fellow riders and car enthusiasts. Your safety on the road is what matters most.

If you have any questions regarding diagnostics, torque specs, or troubleshooting steps, please leave a comment below or send an email directly. I am always here to provide full guidance and expert support.

Stay safe, maintain your machines properly, and happy driving!

— Rajesh (Rajesh Technical Giyan