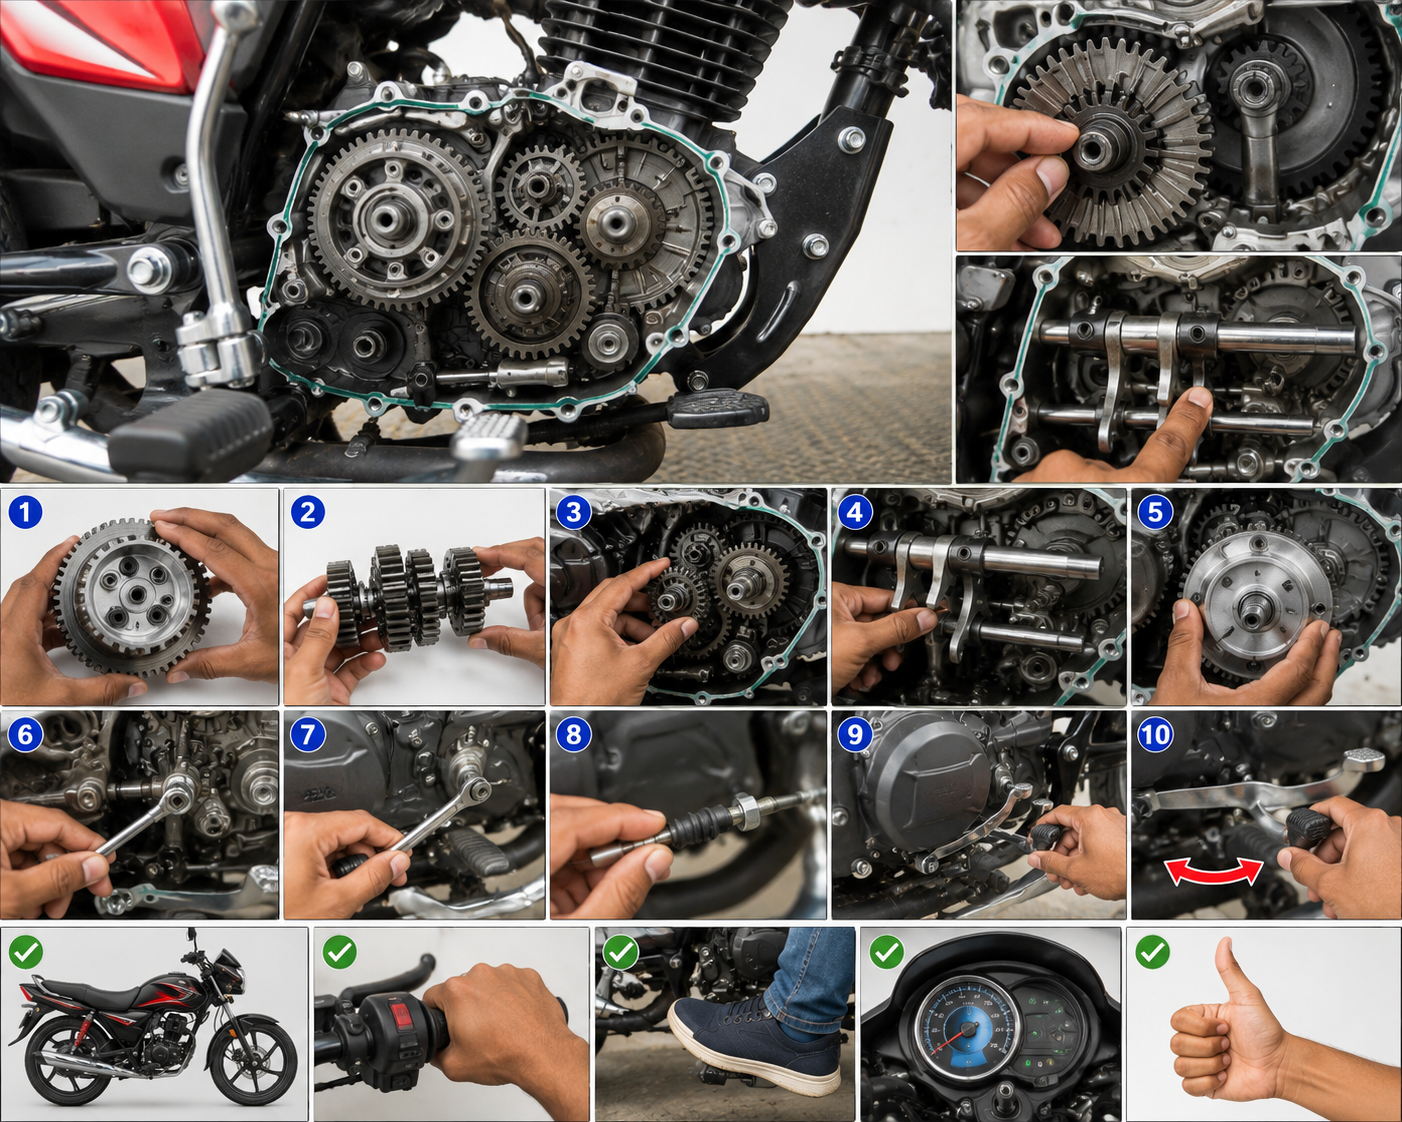
🏍️ Why BS6 Bike Battery Drains Quickly: Full Explanation and Solution

🏍️ Why BS6 Bike Battery Drains Quickly: Full Explanation and Solution

BS6 bikes (Bharat Stage VI emission norm vehicles) have transformed the two-wheeler market with advanced fuel systems and better emission control technology. While they are highly efficient, eco-friendly, and designed for smooth performance, a common issue has been noticed among many riders — rapid battery drainage. Even brand-new or well-maintained BS6 bikes often start showing signs of a weak or dead battery much earlier than expected. Whether it’s due to complex fuel injection systems, continuous sensor monitoring, or frequent short commutes, a weak battery can turn your daily ride into a stressful struggle.

This comprehensive technical guide covers all the major mechanical and electronic reasons behind BS6 bike battery problems and also provides practical, step-by-step solutions to extend your battery’s operational life. In this deep-dive analysis, we will explore Electronic Control Unit (ECU) parasitic draw, alternator charging thresholds, closed-loop sensor power demands, and how to accurately measure battery health using a digital multimeter to prevent sudden breakdowns.


 Reason 2: Automatic Headlamp On (AHO)

By law, all BS6 bikes come with AHO (Automatic Headlamp On). This means the headlight switches on automatically the moment you start the bike.

Continuous headlamp usage increases battery load.

In older BS4 bikes, riders could turn the headlight off, but now that option is gone.

🔧 Solution: Replace conventional bulbs with LED headlamps. LEDs consume less power and reduce stress on the battery.

 Reason 3: Lower Idle RPM

BS6 bikes are programmed with low idle RPM to minimize emissions.

At low idle speeds, the alternator produces less electricity.

As a result, the battery doesn’t charge properly in stop-and-go traffic or when used for short trips.

 Example: Daily 2–3 km commutes are not enough to recharge the battery.

 Reason 4: Cold Starts and ECU Load

During cold weather or rainy seasons:

Sensors take longer to stabilize.

The ECU consumes extra power to balance the fuel-air ratio.

👉 This puts additional stress on the battery, especially if it’s already weak.

 Tip: Warm up your bike for 2–3 minutes before riding. Avoid hard acceleration during a cold start.

 Reason 5: Smaller Battery Capacity

Most commuter BS6 bikes come with 3Ah or 4Ah batteries, which are only just enough to power the bike’s essential electronics.

With FI, AHO, ECU, and sensors, such small batteries drain faster.

If you add extra accessories like a USB charger, GPS tracker, or loud horn, the problem gets worse.

 Solution: Upgrade to a higher-capacity battery (5Ah or 6Ah) after confirming with your service center.

 Reason 6: Faulty Rectifier / Regulator or Weak Alternator

If your bike’s rectifier or voltage regulator is faulty:

The battery may not charge properly while riding.

In some cases, it may even overcharge and get damaged.


 Warning Signs:

Headlight brightness keeps fluctuating.

Sudden failure of the self-start.

Battery overheating.

 Reason 7: Loose Terminals or Poor Grounding

Sometimes the problem lies in the wiring, not the battery.

Loose terminals

Rusted connectors

Faulty grounding

These cause current leakage, leading to overnight battery drainage.

 What to Do: Remove the battery cover, clean the terminals with sandpaper, tighten all nuts, and apply petroleum jelly to prevent rust.

 Reason 8: Frequent Use of Self-Start and Ignition ON

If you:

Use self-start frequently instead of kick-start (where available), or

Keep the ignition in ON mode while the engine is off

Then you are wasting battery power unnecessarily.

 Practice: Use the kick-starter occasionally, especially when the battery feels weak. Never leave the ignition ON while waiting.

 Reason 9: Poor-Quality or Old Battery

Not all manufacturers provide high-quality batteries in BS6 bikes.

Cheap or unbranded batteries have lower charge retention.

After 2–3 years of use, even good batteries start draining faster


Check: If your battery is older than 24 months, replace it with a reliable brand like Exide, Amaron, or SF Sonic.

 Practical Tips to Prevent Battery Drain in BS6 Bikes

Tip Description

🔄 Ride Regularly

Take 10–15 km rides every 2–3 days

🔌 Use LED Bulbs

Reduces electrical load

🔒 Kill-Switch Usage

Don’t leave ignition ON unnecessarily

🔧 Regular Servicing

Check charging system, terminals, and battery water level

🏍 Kick-Start Often

Especially in cold conditions or low charge situations

📵 Limit Accessories

Avoid overloading the system with gadgets

When to Visit a Mechanic?

You should get your battery checked if:

Self-start doesn’t work even after long rides

Battery drains within a day or two

Indicators or headlights flicker frequently

Horn becomes weak

👉 A mechanic can perform a battery load test and charging system inspection to identify the exact faultRead also tvs-bike-clutch-center-starting-issue


 Conclusion

BS6 bikes are designed for cleaner emissions and better efficiency, but they require smarter battery management.

👉 If your BS6 bike battery drains quickly, don’t ignore it. Check your riding habits, the age of your battery, and the overall electrical health of your bike.

👉 By following simple tips like riding regularly, limiting accessories, and maintaining the charging system, you can extend the life of your battery and enjoy smooth rides.

A draining battery is not a sign that your BS6 bike is bad — it’s simply a result of modern features that demand more power. By following the right maintenance tips, checking the charging system, and using your bike regularly, you can keep your battery healthy for years. Remember, prevention is always better than cure. Treat your BS6 bike’s battery with care, and it will never let you down.

Friends, if you found this technical guide helpful, please feel free to share it with your fellow riders and car enthusiasts. Your safety on the road is what matters most.

If you have any questions regarding diagnostics, torque specs, or troubleshooting steps, please leave a comment below or send an email directly. I am always here to provide full guidance and expert support.

Stay safe, maintain your machines properly, and happy driving!

— Rajesh (Rajesh Technical Giyan


Engine Sound Vibration Solution – Complete Guide to Fix Engine Noise & Vibrat

Engine Sound Vibration Solution – Complete Guide to Fix Engine Noise & Vibration

Many car and bike owners face problems  like engine vibration at idle, heavy engine noise, the vehicle shaking while driving, knocking sounds from the engine, vibration while accelerating, and rough engine performance. At first, these problems may look small, but if ignored for a long time, they can damage important engine parts and drastically increase repair costs.

In this complete guide, you will learn the main causes of engine vibration, symptoms, and step-by-step solutions. We will analyze the critical roles of worn engine mounts, harmonic balancers, ignition misfires, and improper valve clearances. Additionally, you will learn how to differentiate between mechanical knocks and detonation, giving you the precision required to pinpoint and eliminate harsh vibrations safely.


Key Takeaways

  • Identification of Core Causes: Differentiating between engine mount failure, combustion misfires, and drivetrain imbalances.
  • Petrol vs. Diesel Noise Dynamics: Understanding inherent diesel torque vibration versus abnormal mechanical knocking.
  • Diagnostic & Inspection Methods: Step-by-step visual and physical checks for spark plugs, fuel injectors, timing belts, and oil levels.
  • Preventive Maintenance Practices: Actionable tips to preserve dampeners, improve engine smoothness, and prevent costly internal overhauls.

1. Check Engine Mounting

Engine mounting is one of the most important components responsible for controlling engine vibration and damping chassis shock.

The engine mounting assembly contains dense vulcanized rubber or hydraulic fluid chambers that absorb vibrational harmonics and prevent mechanical shaking from transferring directly to the vehicle body.

Symptoms of Damaged Engine Mounting

  • Heavy vibration felt inside the cabin or handlebar
  • Engine bonnet or body panels shaking noticeably at idle
  • Physical engine displacement or movement during acceleration
  • Gear shifting becomes clunky or misaligned
  • Excessive thumping noise from the engine bay upon starting or stopping

When mounting rubber becomes worn, cracked, or completely broken, the unbuffered mechanical energy of the rotating engine transfers directly into the chassis.

Solution

  • Inspect engine mountings carefully for dry rot, rubber cracks, or fluid leakage.
  • Replace cracked or collapsed mountings immediately using proper torque specifications.
  • Always use genuine high-grade mounting replacement parts. Low-quality aftermarket mounts lack proper dampening capacity and deteriorate rapidly.

2. Inspect Spark Plugs (Petrol Engines)

In petrol engines, spark plugs are critical for maintaining stable flame propagation and balanced cylinder combustion.

A worn or fouled spark plug causes inconsistent cylinder firing (misfiring), which disrupts crank balance and causes severe engine shaking.

Symptoms of Bad Spark Plugs

  • Engine misfires and hesitation under load
  • Rough, erratic idle speed
  • Loss of throttle response and sluggish acceleration
  • Increased fuel consumption and unburnt fuel smell from exhaust
  • Severe engine vibration at low RPMs

Solution

  • Remove and inspect spark plugs regularly for carbon buildup, oil fouling, or eroded electrodes.
  • Adjust spark plug electrode gaps according to factory specifications.
  • Replace standard spark plugs every 10,000 km to 15,000 km.

3. Check Fuel Injectors (Diesel & Gasoline Direct Injection)

Fuel injectors control precise fuel atomization and volume delivery inside the engine combustion chamber.

If an injector tip becomes clogged, carbonized, or develops a faulty spray pattern, fuel atomization suffers, causing severe engine imbalance.

Symptoms of Faulty Injectors

  • White or grey smoke from the exhaust due to unburnt fuel
  • Heavy black smoke during sudden acceleration
  • Metallic engine knocking or pinging sound
  • Significant power loss under load
  • Excessive engine vibration while driving

Solution

  • Perform professional ultrasonic fuel injector cleaning and flow testing.
  • Always use high-quality, unadulterated fuel from trusted fuel stations.
  • Replace malfunctioning or leaking injectors promptly.

4. Check Engine Oil Level and Viscosity

Engine oil lubricates internal rotating components, reduces metal-to-metal friction, and assists in dampening hydraulic valve lifter noise.

Low or degraded engine oil increases internal friction, leading to elevated operating temperatures, mechanical clatter, and elevated vibration levels.

Symptoms of Poor Engine Oil Condition

  • Elevated engine running temperature
  • Harsh, metallic tapping or clicking sounds from the cylinder head
  • Increased overall engine vibration
  • Accelerated mechanical wear and power loss

Solution

  • Check engine oil level weekly using the dipstick.
  • Top up with the exact viscosity grade recommended by the vehicle manufacturer.
  • Change engine oil and oil filter at specified service intervals without delay.

5. Check Clutch Assembly & Flywheel

If vibration occurs primarily when releasing the clutch pedal/lever, the issue lies within the drivetrain coupling mechanism.

Symptoms of Clutch Issues

  • Violent judder or shaking during clutch engagement
  • Vehicle jerking when taking off from a complete stop
  • Burning friction material smell under hard load
  • Stiff gear engagement or clutch pedal vibration

Solution

  • Inspect the clutch disc lining depth, diaphragm spring condition, and pilot bearing.
  • Inspect the flywheel surface for heat spots, grooves, or warping.
  • Replace worn clutch sets as a complete kit.

6. Check Wheel Balancing & Alignment

Occasionally, chassis shaking is mistaken for engine-related vibration. Imbalanced tire-wheel assemblies generate severe high-speed vibrations that mimic drivetrain defects.

Symptoms

  • Steering wheel or handlebar oscillation at specific speed bands (e.g., 60 km/h to 90 km/h)
  • Vehicle pulling consistently to one side on flat roads
  • Rapid, uneven tire tread wear
  1. Perform dynamic wheel balancing using precision weight distribution equipment.
  2. Align front and rear suspension geometry to factory alignment specifications.

Solution


7. Air Filter & Fuel Filter Inspection

Restricted air or fuel flow disturbs the stoichiometric air-fuel ratio needed for smooth combustion, causing engine hesitation and rough operation.

Solution

  • Clean or replace the engine air filter at every service interval.
  • Replace fuel filters periodically to protect the fuel pump and injectors.

8. Engine Timing System Inspection

Incorrect valve or ignition timing disrupts cylinder synchronization, resulting in pre-ignition, detonation, and destructive engine vibration.

Solution

  • Inspect timing belt or chain tension and alignment marks according to service schedules.
  • Replace worn timing belts, guides, and hydraulic tensioners immediately.

9. Inspect Loose Mounting Brackets & Exhaust Hangers

Extraneous vibrations and rattling sounds are frequently traced to loose external hardware rather than internal engine components.

Common Sources to Verify: Exhaust pipe heat shields, loose engine decorative covers, radiator mounting bushings, and battery clamps.


When Should You Visit a Professional Mechanic?

Seek immediate professional diagnostic assistance if:

  • Engine vibration increases rapidly or suddenly during operation
  • The Check Engine light illuminates or flashes on the instrument cluster
  • Deep, metallic knocking sounds originate from the lower engine crankcase
  • Thick black, white, or blue smoke billows from the exhaust system

Petrol vs Diesel Engine Vibration Dynamics

Petrol Engines: Lower compression ratios result in smoother combustion pulses, lower inherent mechanical noise, and refined power delivery.

Diesel Engines: High compression ignition creates stronger combustion pressure waves, resulting in higher intrinsic vibration levels, but higher low-end torque output.


Practical Tips to Prevent Engine Noise and Vibration

  1. Allow the engine to idle briefly on cold starts to establish full oil pressure before driving.
  2. Avoid low-RPM lugging in high gears, which places extreme stress on engine mounts.
  3. Use genuine high-grade lubricants and OEM replacement components.
  4. Stick strictly to scheduled service intervals for oil, filter, and spark plug changesread also bs6-sensors-explained-common-fi-system-problem

Conclusion

Engine sound and vibration problems should never be ignored. Small issues like damaged engine mounts, dirty fuel injectors, low oil levels, or wheel imbalance can steadily escalate into major mechanullnical failures if left unaddressed.

By systematically diagnosing symptoms, applying correct repair procedures, and maintaining essential engine systems, you can eliminate unwanted noise, preserve fuel efficiency, and ensure a smooth, dependable driving experience.


Frequently Asked Questions (FAQ)

Q1. Why does my engine vibrate excessively at idle speed?
Idle vibration is commonly caused by worn rubber engine mounts, fouled spark plugs, dirty fuel injectors, or a vacuum leak disrupting air-fuel mixture.

Q2. Can running on low engine oil cause engine vibration?
Yes, insufficient oil increases internal metal friction, causes hydraulic lifter collapse, elevates operating temperatures, and creates harsh running conditions.

Q3. Is a certain amount of diesel engine vibration considered normal?
Yes, due to high compression ignition, diesel engines inherently produce more mechanical vibration than petrol engines. However, sudden or extreme shaking indicates an underlying mechanical fault.

Q4. Can tire imbalance cause vibrations that feel like engine troubles?
Yes, imbalanced wheels generate rotational vibrations that transfer through the steering wheel and body paneling, frequently mistaken for engine faults.

Q5. How often should petrol spark plugs be inspected or replaced?
Standard spark plugs should be inspected every 5,000 km and replaced every 10,000 km to 15,000 km.


If you found this technical guide helpful, please feel free to share it with your fellow riders, motorists, and automotive enthusiasts. Your safety and vehicle reliability are what matter most.

If you have any questions regarding diagnostics, torque specs, or troubleshooting steps, please leave a comment below or send an email directly. I am always here to provide full technical guidance and expert support.

Stay safe, maintain your machines properly, and happy driving!

— Rajesh (Rajesh Technical Giyan)