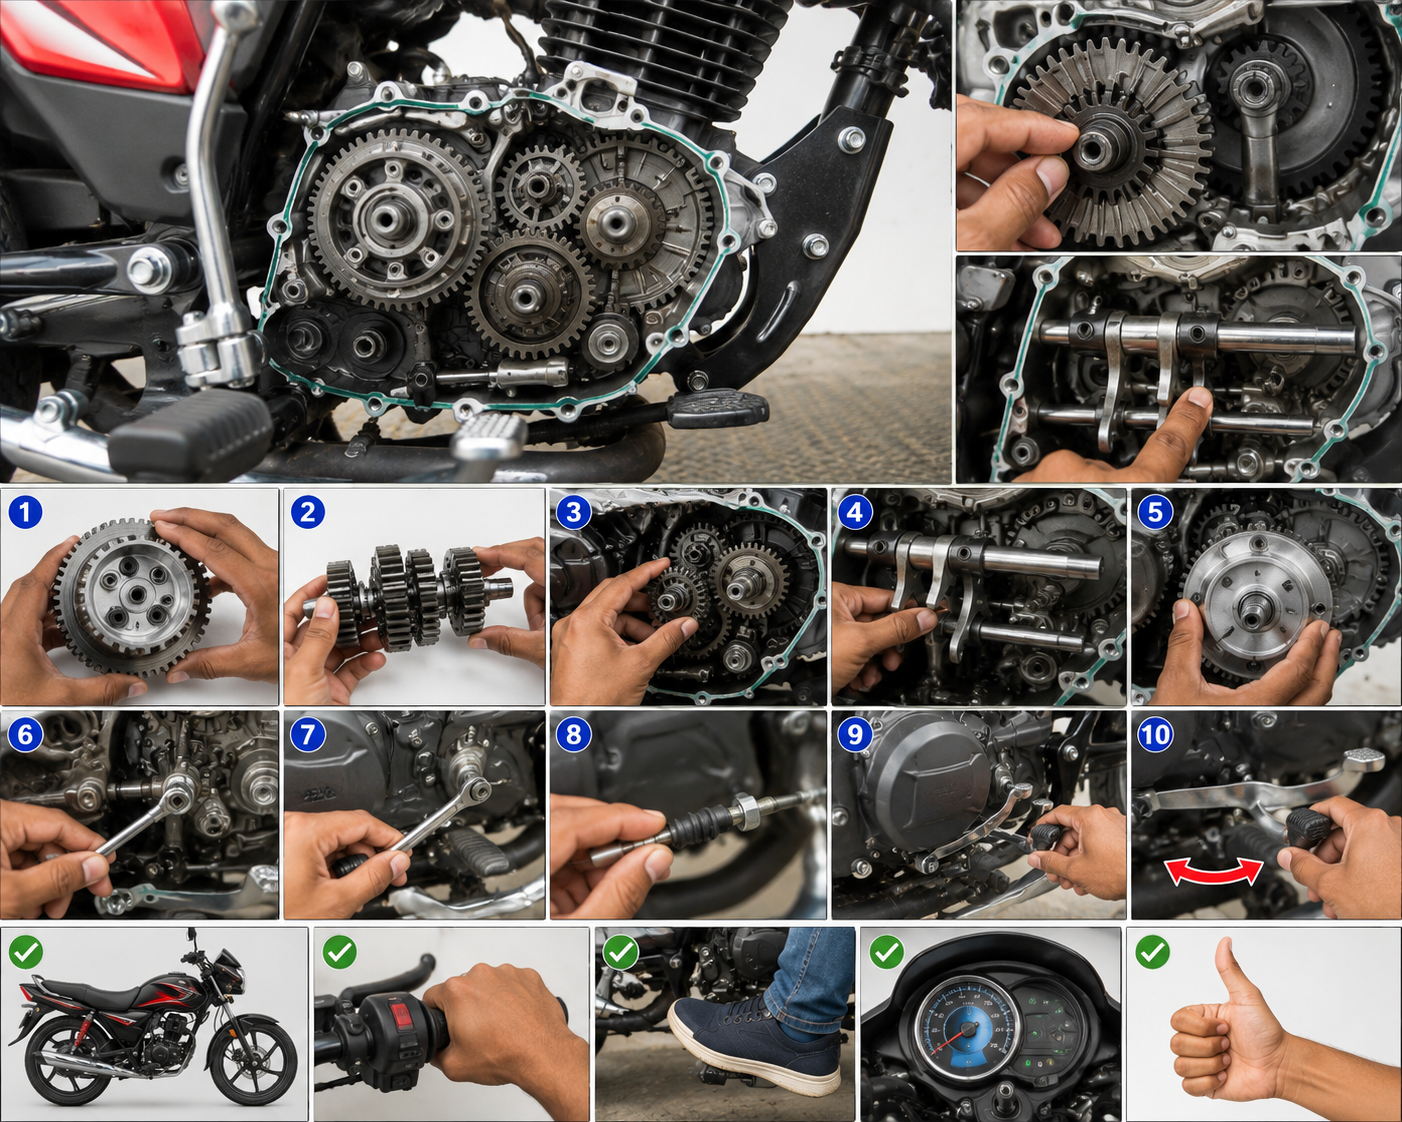
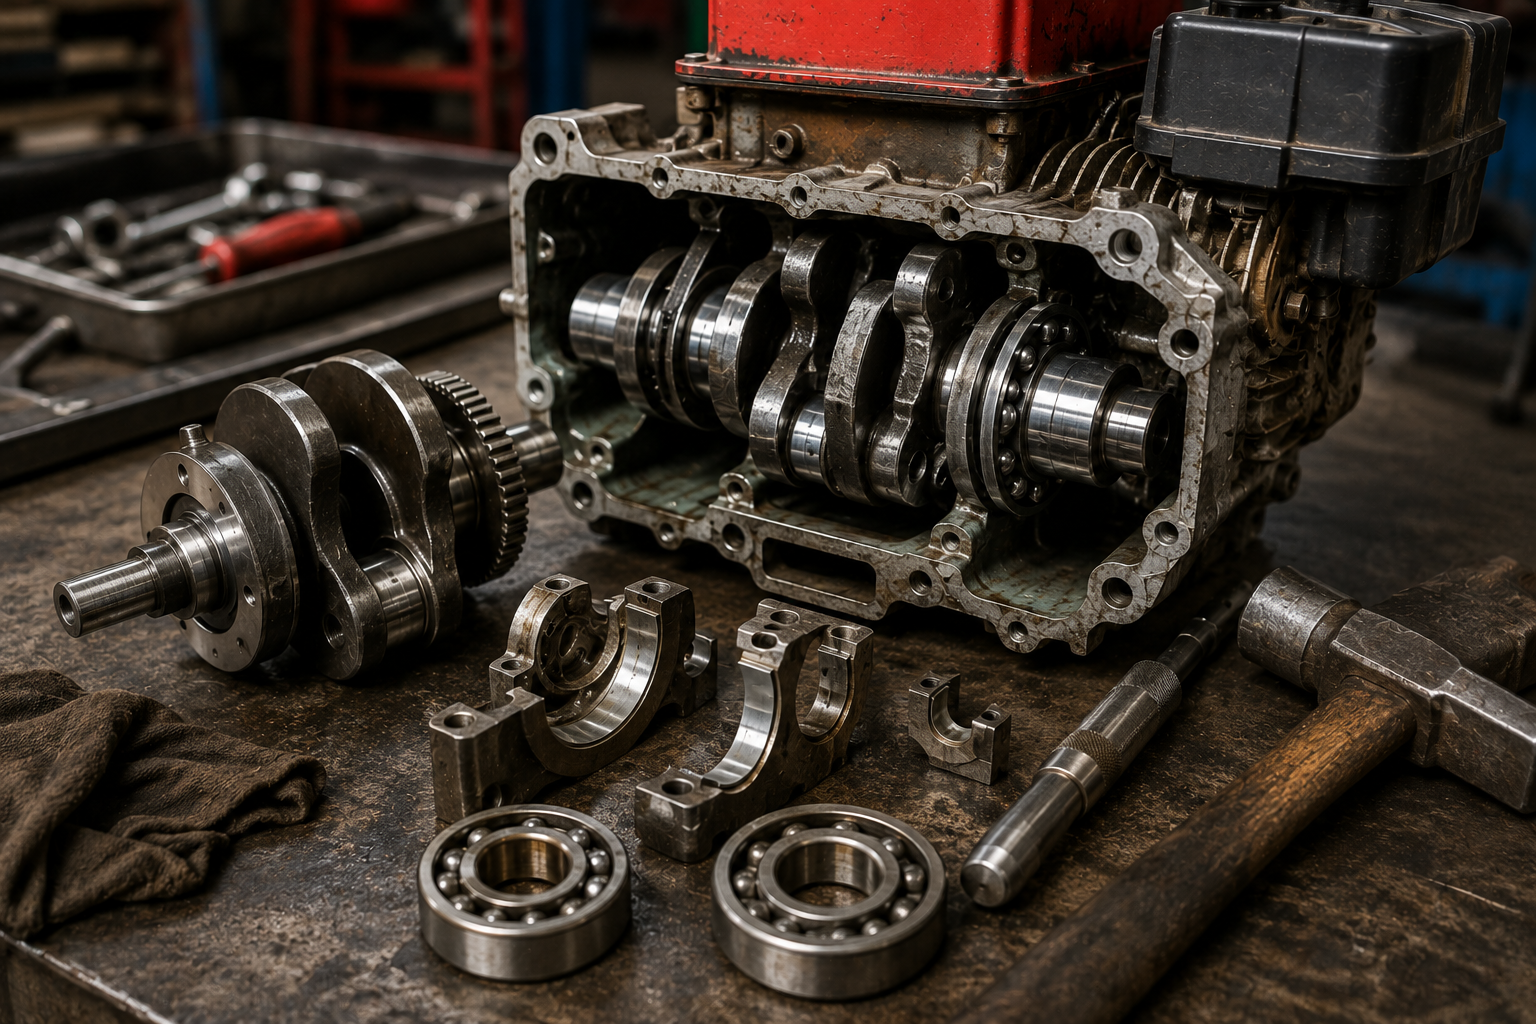
The crankshaft bearing is one of the most important components inside an engine. It supports the crankshaft and allows it to rotate smoothly while carrying the loads generated during engine operation. When a crankshaft bearing becomes worn or damaged, the engine may develop abnormal noise, excessive vibration, crankshaft play, overheating, or poor mechanical performance.
A damaged bearing should not be ignored. Continued operation can damage the crankshaft, bearing housing, connecting rod, seals, and other internal engine components.
The exact design of a 10 HP engine can vary depending on the manufacturer and application. Some engines use different bearing arrangements, crankcase designs, lubrication systems, and shaft configurations. Therefore, the exact bearing number, dimensions, clearances, torque specifications, and assembly procedure must always be confirmed for the particular engine being repaired.
This guide explains the general workshop procedure for replacing a crankshaft bearing safely and correctly.
1. Identify the Engine and Bearing
Before opening the engine, identify the exact engine model and specification.
A “10 HP engine” describes the approximate power output, but it does not identify the exact engine design.
Check:
- Engine manufacturer
- Model number
- Engine serial number
- Crankshaft design
- Bearing type
- Bearing dimensions
- Lubrication system
- Recommended replacement parts
Never order a bearing based only on horsepower.
The correct bearing must match the original engine specification.
2. Recognize the Symptoms of a Bad Crankshaft Bearing
A damaged crankshaft bearing can produce several symptoms.
Common signs include:
- Deep knocking or rumbling noise
- Excessive engine vibration
- Crankshaft side play
- Abnormal bearing noise
- Difficult engine rotation
- Excessive heat
- Metal particles in engine oil
- Oil leakage around a damaged seal
- Reduced engine performance
However, these symptoms can also be caused by other mechanical problems.
Therefore, the bearing should be inspected before replacing it.
3. Prepare the Required Tools
Before starting the repair, prepare the necessary tools.
Typical tools may include:
- Socket set
- Spanner set
- Screwdrivers
- Allen keys where applicable
- Torque wrench
- Bearing puller
- Bearing separator if required
- Soft-faced hammer
- Circlip pliers
- Feeler gauge
- Vernier caliper
- Micrometer
- Cleaning brush
- Engine-safe cleaning solvent
- Assembly lubricant
- Suitable heating equipment if specified
- New gaskets and seals
- Correct replacement bearing
For some engines, a hydraulic press may be required.
Do not try to remove a tightly fitted bearing by repeatedly striking the crankshaft with a normal steel hammer.
4. Clean the Engine Before Disassembly
Before opening the engine, clean the outside thoroughly.
Dirt and dust around the crankcase can enter the engine during disassembly.
Clean the:
- Crankcase exterior
- Cylinder area
- Bearing housing area
- Oil-drain area
- Shaft area
- Fasteners
A clean working environment is extremely important during engine rebuilding.
5. Drain the Engine Oil
If the engine uses a wet-sump lubrication system, drain the engine oil before disassembly.
Place an appropriate drain container underneath the drain point.
Remove the drain plug carefully and allow the oil to drain completely.
Inspect the drained oil for unusual metal particles.
Metallic debris can provide useful information about internal engine wear.
Dispose of used oil responsibly.
6. Remove External Components
Depending on the engine design, several external components may need to be removed before accessing the crankcase.
These can include:
- Recoil starter or electric starter components
- Fuel tank
- Exhaust components
- Carburetor
- Air filter assembly
- Flywheel
- Ignition components
- Pulley or coupling
- Side covers
- Oil pump components
- Other external brackets
Before removing components, take photographs or make reference marks where useful.
This can make reassembly easier.
7. Remove the Flywheel Carefully
Many small engines use a flywheel mounted on the crankshaft.
The flywheel may be secured with a nut, washer, key, or other retaining arrangement.
Remove the retaining hardware and use the appropriate flywheel puller if necessary.
Do not strike the outer edge of the flywheel aggressively.
Also inspect the flywheel key.
A damaged or incorrectly installed key can cause ignition timing problems on engines where the key establishes the required position.
8. Remove the Crankcase Components
Once the external components are removed, access the crankcase according to the engine’s design.
Remove the crankcase fasteners in an appropriate sequence.
Keep bolts organized because different fasteners may have different lengths.
If the crankcase halves are joined tightly, use the manufacturer’s recommended separation points.
Do not force a screwdriver between precision-machined mating surfaces because this can damage the sealing surfaces.
9. Separate the Crankcase Carefully
Once all fasteners and retaining components have been removed, separate the crankcase carefully.
Inspect the mating surfaces for:
- Old gasket material
- Sealant
- Scratches
- Cracks
- Warping
- Corrosion
Do not use excessive force.
If the crankcase refuses to separate, stop and check whether a hidden fastener, circlip, bearing retainer, or other component is still installed.
10. Remove the Crankshaft
After opening the crankcase, carefully remove the crankshaft assembly.
Depending on the engine design, the crankshaft may be connected to the piston and connecting rod.
Do not allow the crankshaft to fall or contact hard surfaces.
Place it on a clean workbench.
Inspect the crankshaft for:
- Scoring
- Wear
- Blue or dark heat marks
- Damaged bearing journals
- Excessive play
- Thread damage
- Keyway damage
A new bearing should not be installed onto a severely damaged crankshaft journal.
11. Inspect the Old Bearing
Before removing the old bearing, inspect it carefully.
Check for:
- Rough rotation
- Excessive play
- Noise
- Discoloration
- Pitting
- Damaged seals
- Corrosion
- Spinning in the housing
A healthy bearing should rotate smoothly without abnormal roughness.
If the bearing feels gritty, loose, noisy, or damaged, replacement is usually required.
12. Remove the Old Bearing
The correct removal method depends on the bearing arrangement.
If the bearing is mounted on the crankshaft, an appropriate bearing puller or separator may be required.
If the bearing is installed inside the crankcase housing, the appropriate removal tool should be used from the correct direction.
Never apply force to the wrong bearing race.
For example, when removing a bearing from a shaft, force should be applied appropriately to the race that is fitted to the shaft.
Incorrect force can damage the bearing seat or crankshaft.
13. Inspect the Bearing Housing
After removing the old bearing, clean the bearing housing thoroughly.
Inspect the housing for:
- Cracks
- Wear
- Scoring
- Corrosion
- Loose bearing fit
- Damage to retaining features
The bearing must fit correctly in the housing.
If the bearing housing has become excessively loose, simply installing a new bearing may not solve the problem.
The crankcase may require further repair or replacement.
14. Inspect the Crankshaft Journal
The crankshaft should be inspected before installing the new bearing.
Measure the relevant shaft dimensions using appropriate precision measuring equipment.
Check for:
- Wear
- Taper
- Out-of-round condition
- Scoring
- Corrosion
- Heat damage
Compare the measurements with the manufacturer’s service limits.
If the crankshaft is outside the permitted specification, replacing only the bearing may result in another failure.
15. Select the Correct Replacement Bearing
The replacement bearing must match the exact engine specification.
Check:
- Bearing number
- Inside diameter
- Outside diameter
- Width
- Clearance specification
- Seal configuration
- Temperature rating
- Lubrication requirements
Do not choose a bearing only because its dimensions appear similar.
The correct bearing specification is important for reliable engine operation.
16. Prepare the New Bearing
Before installation, inspect the new bearing.
Make sure:
- It is clean
- It is undamaged
- The correct bearing is being used
- The seals are in good condition where applicable
- It has not been contaminated by dirt
Do not wash a sealed bearing with an unsuitable solvent.
Follow the bearing manufacturer’s recommendations.
17. Install the New Bearing
Bearing installation requires care.
Depending on the engine design, the bearing may be installed using a press, suitable installation tool, or controlled heating method.
The force must be applied to the correct bearing race.
Never transfer installation force through the rolling elements unnecessarily.
If the bearing is being pressed onto a shaft, apply force appropriately to the inner race.
If the bearing is being pressed into a housing, apply force appropriately to the outer race.
This prevents damage to the new bearing.
18. Use Controlled Heating When Appropriate
Some bearing installations are designed to use controlled heating to expand the bearing slightly before installation.
If this method is specified, use appropriate temperature-controlled equipment.
Do not heat a bearing with an uncontrolled flame.
Excessive heat can damage bearing lubrication, seals, or material properties.
Always follow the bearing manufacturer’s and engine manufacturer’s installation instructions.
19. Install the Bearing to the Correct Position
The bearing must be fully and correctly seated.
After installation, check that:
- The bearing is fully seated
- Retaining clips are correctly installed
- Bearing orientation is correct
- The crankshaft rotates correctly
- No abnormal resistance exists
Do not assume that a bearing is correctly installed simply because it looks close to its final position.
20. Replace the Oil Seals
Whenever the crankshaft and bearing assembly is being rebuilt, inspect the oil seals.
If a seal is worn, hardened, damaged, or leaking, replace it with the correct seal.
A new bearing will not solve an oil leak caused by a damaged crankshaft seal.
When installing an oil seal, use the appropriate installation tool and avoid damaging the sealing lip.
Apply suitable lubricant where specified.
21. Reinstall the Crankshaft
After the new bearing and seals are correctly installed, reinstall the crankshaft assembly.
Make sure the connecting rod and other components are positioned correctly.
Apply the correct assembly lubricant to the required bearing and moving surfaces according to the engine’s assembly procedure.
Do not use excessive lubricant.
22. Reassemble the Crankcase
Clean the crankcase mating surfaces before assembly.
Remove old gasket material carefully without damaging precision surfaces.
Install the correct new gasket or sealant according to the manufacturer’s procedure.
Join the crankcase halves carefully.
Install the fasteners in the correct sequence.
Use a torque wrench and tighten the fasteners to the specified torque.
Never guess critical engine fastener torque values.
23. Check Crankshaft Rotation
Before installing all external components, rotate the crankshaft manually.
It should turn smoothly without abnormal tight spots, grinding, or binding.
A slight mechanical resistance from compression or other normal engine components may be expected, but sudden binding or grinding is not normal.
If the crankshaft does not rotate correctly, stop and investigate.
Do not use the starter motor to force the engine to rotate.
24. Check Crankshaft End Play and Runout
Where applicable, measure crankshaft end play according to the manufacturer’s procedure.
Runout may also need to be checked using appropriate precision equipment.
These measurements are important because a crankshaft can appear visually straight while still being outside the permitted specification.
If the measurements exceed the service limits, additional crankshaft or bearing-housing work may be required.
25. Reinstall the Flywheel and External Components
Once the crankshaft rotates correctly, reinstall the flywheel and other removed components.
Install the flywheel key correctly where applicable.
Tighten the flywheel retaining hardware to the manufacturer’s specified torque.
Then reinstall:
- Covers
- Starter components
- Carburetor or fuel-system components
- Air filter
- Exhaust
- Fuel tank
- Other removed parts
Check every connection before starting the engine.
26. Fill the Correct Engine Oil
After assembly, fill the engine with the correct type and quantity of oil specified for the exact engine.
Do not use an oil simply because it is marketed for another engine.
The required oil specification depends on the engine design and operating conditions.
After filling, check the oil level using the correct procedure.
27. Perform a Final Inspection
Before starting the engine, inspect everything carefully.
Check:
- Crankcase fasteners
- Oil seals
- Drain plug
- Oil level
- Flywheel
- Fuel connections
- Electrical connections
- Exhaust
- Air filter
- Throttle linkage
- Engine controls
Make sure there are no tools or loose parts near moving components.
28. Start the Engine Carefully
Start the engine according to the normal starting procedure.
Do not immediately run the engine at high speed.
Listen carefully for abnormal sounds.
Pay attention to:
- Bearing noise
- Knocking
- Grinding
- Excessive vibration
- Oil leakage
- Engine temperature
- Abnormal smoke
If a serious mechanical noise appears immediately after rebuilding, shut the engine down and investigate.
Do not continue operating an engine that is making severe abnormal noise.
29. Check for Oil Leakage
After the engine runs, inspect the crankcase and crankshaft seal areas.
Look for oil leakage around:
- Crankshaft seals
- Crankcase joints
- Drain plug
- Covers
- Other sealing points
If oil begins leaking immediately after assembly, stop the engine and identify the source.
30. Perform a Controlled Test
After confirming that the engine is operating normally, allow it to reach normal operating conditions according to the manufacturer’s recommendations.
Avoid unnecessary high-speed operation immediately after a major internal repair.
Monitor the engine for:
- Smooth operation
- Abnormal vibration
- Oil leakage
- Temperature
- Unusual bearing noise
- Changes in engine performance
After the test, inspect the engine again.
Common Mistakes to Avoid
Installing the Wrong Bearing
Never select a bearing based only on engine horsepower.
Using Excessive Force
Never hammer directly on the bearing or crankshaft without the correct installation method.
Pressing on the Wrong Race
Incorrect installation force can damage a new bearing.
Ignoring Crankshaft Wear
A damaged crankshaft can quickly destroy a new bearing.
Reusing Damaged Seals
A new bearing cannot compensate for a leaking crankshaft seal.
Guessing Torque Values
Always use the correct specifications for the exact engine.
Contaminating the Bearing
Keep dirt, metal particles, and unsuitable chemicals away from the new bearing.
Skipping Measurements
Visual inspection alone cannot confirm bearing clearance, shaft dimensions, or crankshaft runout.
Final Crankshaft Bearing Replacement Checklist
Before starting the engine, confirm:
- Correct bearing identified
- Old bearing completely removed
- Bearing housing inspected
- Crankshaft inspected and measured
- New bearing installed correctly
- Correct installation force used
- Bearing fully seated
- Retaining components installed
- Oil seals inspected or replaced
- Crankcase surfaces cleaned
- New gasket or correct sealant installed
- Fasteners tightened to specification
- Crankshaft rotates smoothly
- End play checked where required
- Flywheel correctly installed
- Correct engine oil filled
- No visible leaks
- All external components installedRead also how-ecm-controls-fuel-injectors
Final Thoughts
Replacing the crankshaft bearing in a 10 HP engine is a precision mechanical repair. Although the basic procedure may appear straightforward, the quality of the final repair depends on accurate inspection, correct measurements, proper bearing selection, correct installation technique, and careful reassembly.
The most important point is that 10 HP alone is not enough information to identify the correct bearing or service procedure. Always confirm the engine manufacturer, model, serial number, bearing specification, shaft dimensions, and manufacturer’s service limits before starting the repair.
A new bearing should never be installed without inspecting the crankshaft and bearing housing. If either component is worn or damaged beyond the manufacturer’s limits, the underlying problem must be corrected first.
During installation, use the correct bearing puller, separator, press, or controlled heating method as appropriate. Avoid hammering directly on precision components, and always apply installation force to the correct bearing race.
After assembly, manually rotate the crankshaft before starting the engine. Check oil level, inspect for leaks, and perform a controlled initial test. If abnormal grinding, knocking, severe vibration, or oil leakage occurs, stop the engine immediately and investigate.
A carefully rebuilt crankshaft and bearing assembly can provide smooth rotation, reduce vibration, improve reliability, and extend the useful life of the engine.
I hope this 10 HP Engine Crankshaft Bearing Replacement Guide helps mechanics, workshop technicians, farmers, machine operators, and DIY enthusiasts understand the correct general approach to this important engine repair.
For more practical engine repair guides, motorcycle troubleshooting, diesel-engine maintenance, and workshop knowledge, keep visiting Rajesh Technical Giyan.
1 thought on “How to Replace Crankshaft Bearing in a 10 HP Engine: Complete Step-by-Step Guide”